
.png)
The Kitchen Slide Rule
Here’s a handy kitchen aid that will allow even a beginner chef to alter recipes instantaneously for more or less servings. It’s also great when you need to adjust a recipe because you have a limited amount of one or more ingredients – two eggs instead of three, for example.
This easy-to-make slide rule Calculator is a project that’s perfect for your MARK V Routing Package. We’ve included a full-size scale that you can print, cut out and attach to both parts of the 10″ long rule. If you prefer, you can just as easily perform the same operations on a single 41″ long piece of stock and end up with four Calculators at a time! Here’s how:
Start by preparing enough 1″ x 1-1/2″ clear stock (Maple, Poplar, Cherry, it’s your choice) to make the number of Calculators you want. Joint or sand all edges smooth. Be sure to prepare some matching scrap pieces for set-up and test cuts.
Set up your MARK V in Drill Press mode and install the Router Chuck. Use a 1/4″ Straight Router Bit to cut a 1-1/2″ deep groove down the center of the bottom half of your test stock. Be sure to use Feather Boards and a Push Stick to control your stock safely and keep your hands out of harm’s way while making these cuts. If everything works out, change to your “real” project stock and proceed.

Helpful Items


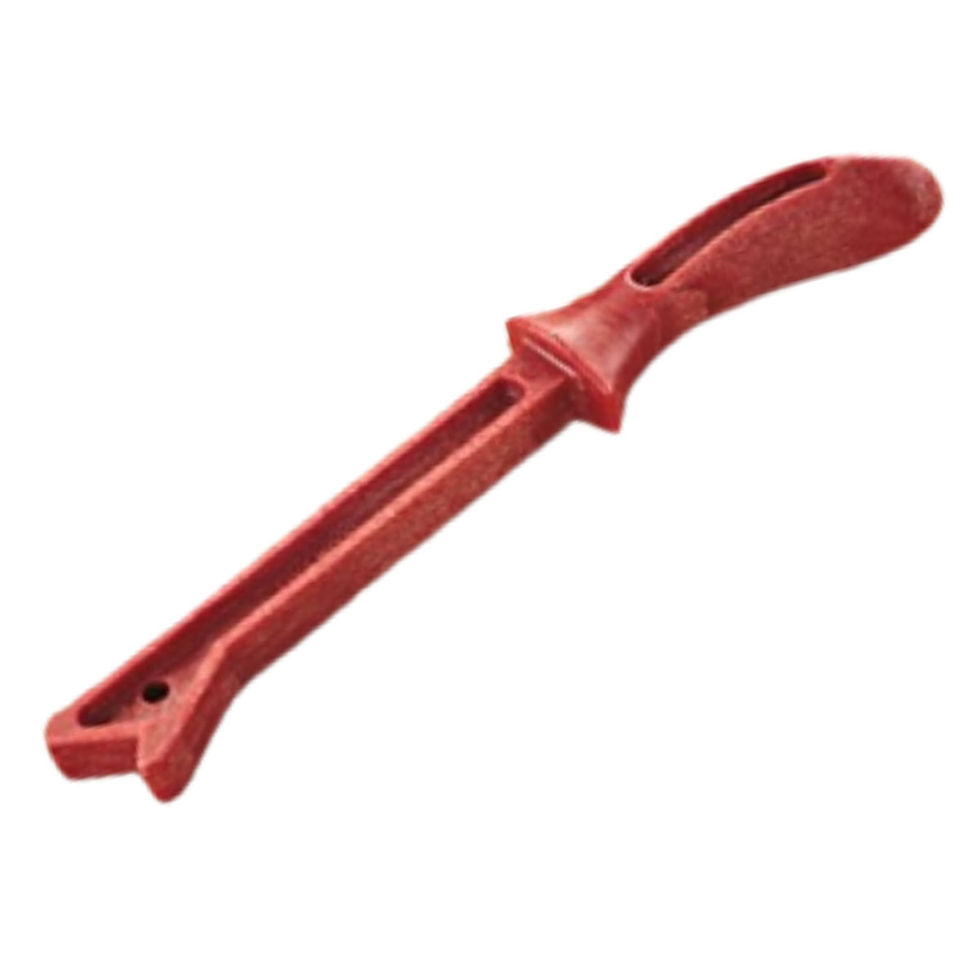
The Toast Tongs
These dandy Toast Tongs are the perfect way to avoid the burnt fingertips that are so often the by-product of removing toast, muffins or (the worst of all) bagels from a blazing toaster! They can be made via one of two methods. However, no matter which method you select, the sides of the tongs should be no thicker than 1/8″ for maximum ease-of-the-squeeze!
Method # 1: One-Piece, Band or Scroll Sawn Method
Although this approach uses a single piece of wood and requires no assembly, if you don’t take your time when cutting out the waste, you’ll eventually use up all those time savings sanding the insides of the legs smooth.
With this method, start by laying-out the drawing on a piece of wood. For added efficiency, begin with a 12-1/8″ long by 7″ wide piece of 3/4″ thick stock and create a layout for 10 tongs on one piece of stock. Use Double-Stick Tape to assemble a 7-high stack of workpieces for “Pad Sawing” on your Bandsaw and you’ll have 70 sets of Tongs when you’ve finished. If you prefer, you could also use your Scroll Saw to “Pad Saw” a 3-high stack of workpieces.
First, drill your 5/8″ diameter holes, then saw out the waste, followed by the outer shape. Use your Belt Sander or Disc Sander to smooth the outer edges and a 1/2″ diameter Drum Sander to smooth between the legs.

Method #2: Three-Piece Assembled Method
With this approach, you’ll spend a little more time cutting out the single pieces and assembling them…but a lot less time sanding. It may be a trade-off. However, the nifty thing about this approach is that you can use contrasting woods for the arched Top and Legs.
Start with 3/4″ thick by 1-1/2″ wide strips of wood (length of your choice) for the arched Tops. Lay out the centerpoints for the 5/8″ dia. holes that form the inside arch of the Tong Tops. Lay your Tops out so that when you crosscut each Top off your strip (after drilling), you’ll be leaving a 5’8″ wide Top insert, to which you’ll attach the two Legs.
Next, resaw and rip 3/4″ wide by 1/8″ thick strips for the Tong Legs…then crosscut them to 6-1/4″ lengths. Glue and clamp them to the sides of the arched Tops and allow to dry overnight.
Use your Belt Sander or Disc Sander to round-off the Tops. Bevel the Tong tips slightly and apply the finish of your choice. We recommend a non-toxic Salad Bowl Finish or Preserve Oil Finish.
Suggested retail prices (depending on woods used and finish)

Switch to the Dovetail Router Bit and rout out the dovetail slot. Next, rout the dovetail tongue. Set everything up to make your cuts with the stock between the Router Bit and the Rip Fence and always feed the stock from right-to-left, AGAINST the rotation of the bit. As with the previous step, start with your test stock before making any cuts on your “real” stock.
Check the fit of the slide. If it’s too loose, you could insert a bullet catch* to provide the added tension you need. Finally, glue on the scale, allow it to dry and apply varnish. If you prefer, you could also cover the scales with clear plastic* for even more protection. Wax the dovetail slots with furniture paste wax.
To use the Calculator, set the amount your recipe calls for on the top scale – over the amount you want on the bottom scale. For example, if the recipe serves eight and you need to fix enough for ten, set the eight over the ten. Now, as you read the recipe, locate the quantity your recipe calls for on the top scale and read the corresponding amount you’ll need for your altered recipe on the bottom scale. It’s just that simple.

