
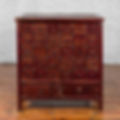
The 16-Drawer Apothecary Chest
Here’s a great piece of furniture that will solve a BIG storage problem – where to put those sewing supplies, scissors, decks of cards, cassette tapes and dozens of other “odds-n-end” items that seem to keep cluttering up the house. Designed to resemble the chests used in old-time drugstores, this Apothecary Chest has 16 generous sized drawers to accommodate lots of things.
We built our chest out of #2 common pine throughout, except for the hardboard back and drawer bottoms…but poplar, cherry, oak or virtually any wood will look great. If you like, you can even save some money on materials by using particleboard for the partitions and plywood for the drawers.

1: Cut out the Sides (A), Top (B), Base Pieces (G & H), and Drawer Fronts (K). This will allow you to select the most attractive wood for the visible parts. Be sure to cut the drawer fronts (K) to about 1/8″ oversize, since the finished drawer sides and bottoms are sanded flush after final assembly.
2: Cut the remaining stock to size, according to the list of materials. We glued-up the 14″ wide partitions (C) out of solid pine, but you could also make these partitions out of 13-1/4″ wide particleboard or plywood, then glue and nail a 3/4″ x 3/4″ strip of pine (or matching wood) facing to the exposed edge.
3: Form the 1/4″ deep by 3/8″ wide rabbet in the back edges of the sides (A) to accept the chest back (J). You can do this by making two cuts with an ordinary saw blade…or by using your Dado Set.
4: Attach the drawer guides (E) to the partitions (C) with 4-penny finishing nails and glue. Mount the guides flush with the back edges of the partitions, being sure to leave a 6-1/16″ spacing between each guide. We temporarily positioned a 6-1/16″ wide piece of scrapwood between each guide during assembly to maintain the exact distance. Attach the 3/4″ x 3/4″ filler strip (D) to the top
Helpful Items


9: Make the drawers. With 16 of them to make, you’ll need to use a few “production” techniques to speed the process up a bit. Start by first ripping all of your drawer stock to the proper widths, then cross cutting the pieces to equal length. Shopsmith’s 24″ Extension Face offers an adjustable stop that will help you cut all the pieces to the same length quickly. Just attach it to your Miter Gauge Face and go to work. Next, use any sawblade with a 1/8″ kerf to cut the grooves in the drawer sides (L) for the drawer bottoms (N). Glue and nail the drawers together, then glue and clamp the fronts (K) into the ends (M) . Flush-sand the drawer bottoms and sides using your Disc Sander or Belt Sander. Slide in the bottoms (N) and tack them in place with 2-penny finishing nails or small brads. Do not glue the drawer bottoms.
10: Finishing touches. Set all exposed nail or brad heads and fill with a high-quality, stainable wood putty. Finish sand the chest then remove all dust with a tack cloth. Apply the stain and clear finish of your choice, attach the knobs and enjoy.

5: Assemble the sides (A) and partitions (C) with glue and 8-penny finishing nails. Be sure to double-check your spacing to make sure you have 6-1/16″ of vertical spacing between each partition. Glue the drawer dividers (F) into place.
6: Shape the edges of the top (B) and the drawer fronts (K) with your Shaper set-up and 1/4″ Quarter-Round Shaper Cutter. As an option, you could also use your Router Package with a 1/4″ Router Chuck and a Round Over Bit. Shape just the sides and front edge of the top.

7: Attach the top (B) to the case, using 8-penny finishing nails – then attach the back (J) with 2-penny common nails or small brads.
8: Miter the corners of the base pieces (G & H). Cut the scrollwork using your Bandsaw or Scroll Saw . Once you’ve made the cuts, smooth them with your Drum Sander. Attach the base pieces, using 4-penny finishing nails and glue.

