Guitar Resto-Mod underway

This is a forum for intermediate to advanced woodworkers. Show off your projects or share your ideas.

Moderators: HopefulSSer, admin

User avatar
nuhobby
Platinum Member
Posts: 2327
Joined: Fri Sep 21, 2007 4:34 am
Location: Indianapolis

Re: Guitar Resto-Mod underway

Post by nuhobby »

BuckeyeDennis wrote: Fri Apr 05, 2024 7:17 am The photo with the plane is absolutely gorgeous. Did you make the plane?

Thanks! Actually it's an ECE Emmerich plane that I had got used. It was very beat-up, so I dressed it up by laying thin strips of holm oak into the sides. Similarly, the decorative button is turned from holm oak.
User avatar
BuckeyeDennis
Platinum Member
Posts: 3697
Joined: Tue Jul 24, 2012 10:03 pm
Location: Central Ohio

Re: Guitar Resto-Mod underway

Post by BuckeyeDennis »

nuhobby wrote: Fri Apr 05, 2024 2:35 pm
BuckeyeDennis wrote: Fri Apr 05, 2024 7:17 am The photo with the plane is absolutely gorgeous. Did you make the plane?

Thanks! Actually it's an ECE Emmerich plane that I had got used. It was very beat-up, so I dressed it up by laying thin strips of holm oak into the sides. Similarly, the decorative button is turned from holm oak.
Wow, I just learned two new things. Had never heard of Holm oak, and am still wondering how you got your hands on some.

The shape of the plane looked vaguely familiar, but the brand name didn’t ring a bell. But after seeing photos of both new and used ones from a Google search, I can honestly say that your inlays take it to a whole new level, aesthetically.
User avatar
nuhobby
Platinum Member
Posts: 2327
Joined: Fri Sep 21, 2007 4:34 am
Location: Indianapolis

Re: Guitar Resto-Mod underway

Post by nuhobby »

It's mind-bending! Pinholes! Halos! :D :cool: :)
A few moments in the shop before the Eclipse mania gets underway here:


Curling some 1/8" x 1/16" walnut strips:
IMG_7271.jpeg
IMG_7271.jpeg (288.2 KiB) Viewed 857 times

Three of those strips gluing in, concentrically:
IMG_7272.jpeg
IMG_7272.jpeg (262.1 KiB) Viewed 857 times
User avatar
nuhobby
Platinum Member
Posts: 2327
Joined: Fri Sep 21, 2007 4:34 am
Location: Indianapolis

Re: Guitar Resto-Mod underway

Post by nuhobby »

Well, the little pinhole scrap pieces maybe worked a little for the Eclipse viewing, but the dark special glasses were better.
Here were 2 pictures about 12 minutes apart in high daylight, Indianapolis area:
IMG_7274.jpeg
IMG_7274.jpeg (34.81 KiB) Viewed 775 times
IMG_7279.jpeg
IMG_7279.jpeg (29.54 KiB) Viewed 775 times

I didn't show this in build #1 of the thread, but all the bracings are just slightly curved, and supported by a curved caul during clamping and glue-up. This is to make the flat surfaces a wee bit pre-defined as convex in the finished guitar. Otherwise they might flip in and out if the pieces were just dead flat, during seasonal humidity changes:
IMG_7270.jpeg
IMG_7270.jpeg (162.04 KiB) Viewed 775 times

Making progress -- I'm sort of tickled that the shop-build "rosette" walnut 3-ply inlay didn't turn out too bad:
IMG_7284.jpeg
IMG_7284.jpeg (230.77 KiB) Viewed 775 times
User avatar
nuhobby
Platinum Member
Posts: 2327
Joined: Fri Sep 21, 2007 4:34 am
Location: Indianapolis

Re: Guitar Resto-Mod underway

Post by nuhobby »

Just a bit more work to report lately:


Once the top and bottom boards became slightly "convex" via bracing, inspection shows it threw off the formerly good fit of the sides. I will progressively shave the sides until the air gaps all around the perimeter become uniform and vanish:
IMG_7296.jpeg
IMG_7296.jpeg (124.78 KiB) Viewed 656 times


The slowly assembled top bracing is just about done; getting weights on the last 2 glued pieces:
IMG_7299.jpeg
IMG_7299.jpeg (313.76 KiB) Viewed 656 times


Gradually applying kerfing to the corrected sides, a wee bit at a time, since I don't have 40 clamps to use all at once like the pros:
IMG_7300.jpeg
IMG_7300.jpeg (328.92 KiB) Viewed 656 times


Happy woodworking!
User avatar
BuckeyeDennis
Platinum Member
Posts: 3697
Joined: Tue Jul 24, 2012 10:03 pm
Location: Central Ohio

Re: Guitar Resto-Mod underway

Post by BuckeyeDennis »

What are these things that look kinda like little curled handplane shavings?

Capture.JPG
Capture.JPG (78.04 KiB) Viewed 632 times
User avatar
nuhobby
Platinum Member
Posts: 2327
Joined: Fri Sep 21, 2007 4:34 am
Location: Indianapolis

Re: Guitar Resto-Mod underway

Post by nuhobby »

If you're asking about the yellow areas, it's gaps (for respective back braces) which are letting a lot of light through from a work lamp. After refining, the gaps get smaller, and also backed up with kerf strips. Then the edge will get routed away and replaced with some binding in the future.
User avatar
BuckeyeDennis
Platinum Member
Posts: 3697
Joined: Tue Jul 24, 2012 10:03 pm
Location: Central Ohio

Re: Guitar Resto-Mod underway

Post by BuckeyeDennis »

Ah, so! I can see the gaps now, but couldn’t make visual sense of them before.
User avatar
algale
Platinum Member
Posts: 4796
Joined: Thu Nov 04, 2010 8:13 am

Re: Guitar Resto-Mod underway

Post by algale »

Progressing nicely!
Gale's Law: The bigger the woodworking project, the less the mistakes show in any photo taken far enough away to show the entire project!

User avatar
nuhobby
Platinum Member
Posts: 2327
Joined: Fri Sep 21, 2007 4:34 am
Location: Indianapolis

Re: Guitar Resto-Mod underway

Post by nuhobby »

Continuing on to some tedious detail work...

The adapted hand-cutter I used 2 years ago is still with me. It was pretty cool for soft mahogany and spruce and walnut in those days...
IMG_5524.jpeg
IMG_5524.jpeg (144.2 KiB) Viewed 362 times

But, it is not really going to hold up for hard oak on the new guitar. So, after thinking about it all weekend, I have butchered the edge-guide attachment on my power trim router, and added a cylindrical piece of delrin / acetal to serve as the "follower" for the guitar sides:
IMG_7320.jpeg
IMG_7320.jpeg (286.56 KiB) Viewed 362 times
IMG_7321.jpeg
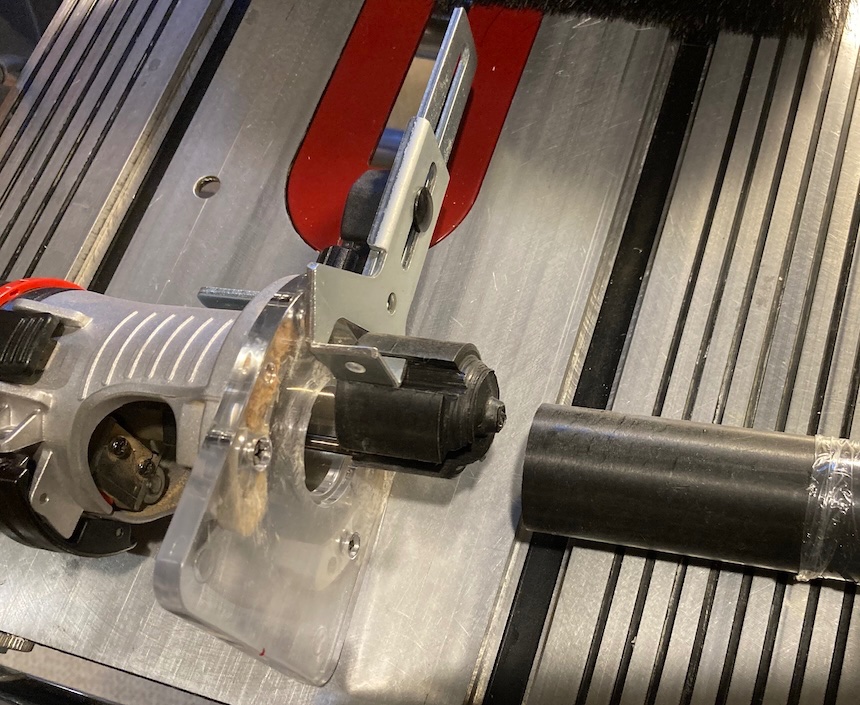
IMG_7321.jpeg (253.58 KiB) Viewed 362 times


First testing task, just a flush cutting operation, to get the top and back to match the curved sides, is working pretty well:
IMG_7322.jpeg
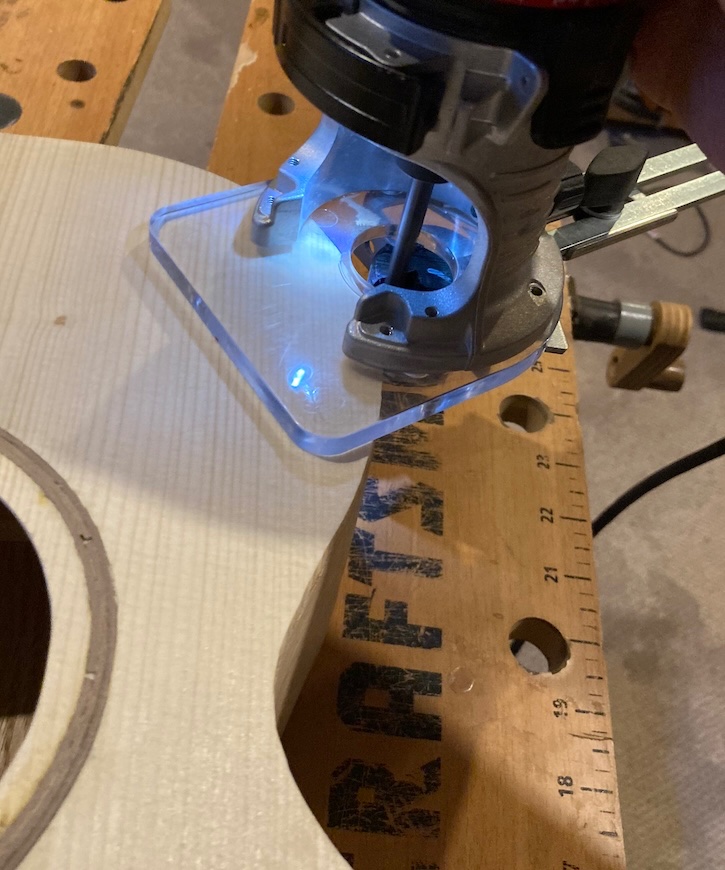
IMG_7322.jpeg (184.82 KiB) Viewed 362 times

The guitar body is entire but very rough. In addition to needing routing for the applied binding borders, some parts need cosmetic covering. Similar to the first guitar shown earlier, I'm covering up the first glue joint in this whole project, some very ugly but nice and tacky and strong JB-Kwik epoxy:
IMG_7324.jpeg
IMG_7324.jpeg (200.32 KiB) Viewed 362 times
IMG_7325.jpeg
IMG_7325.jpeg (211.24 KiB) Viewed 362 times
IMG_7326.jpeg
IMG_7326.jpeg (198.13 KiB) Viewed 362 times

Happy woodworking!

Chris
Post Reply