For the SS stand-alone OPR, I had originally planned to adapt the fence from my Craftsman-branded router table (which was also sold Bosch-branded). The Craftsman table itself was quite nice. But the fence, while well-featured, but was just too flexible for me. I contemplated various stiffening measures, but eventually decided that it made more sense to buy a good fence than to spend hours stiffening the Craftsman fence. This was even after I had laboriously trued the rather acute fence-face angle to exactly 90 degrees, using a SS disc sander.
I spent a fair amount of time researching aftermarket fences, and ultimately found two that looked like they would fit without modification. One was green, and newly on the market. The other was red, and well-reviewed. The price was not greatly different, so I chose the red (Jessem) fence. Then I suppressed my cheapskate instincts, pulled the full-retail-price trigger, and a couple days later a Jessem Master Fence II appeared on my front porch.
Let’s start the review with the bad. The Jessem packaging was definitely second-rate. Check out the photo below, showing where some Brainiac had decided it would be convenient to throw the nice clear see-through Plexiglas bit guard right into the hardware bag, along with all that hard/sharp-edged stuff. The rest of the packaging wasn’t much better.
My engineering side was rather insulted by this sloppiness, and I was almost annoyed enough to send it back. But the actual shipping damage amounted to a couple of minor nicks and scratches, and I probably wouldn’t have even noticed them if not looking for them. So I decided to let it go.

- Parts bag.JPG (357.02 KiB) Viewed 20680 times
Fortunately, the fence design engineer(s) was very obviously not the same guy(s) that designed the packaging. The fence itself is a thing of beauty. If you have a Shopsmith 520 fence, this will speak to you. The Jessem router fence feels for all the world like a 520 fence. In other words, it is one massive chunk of extruded aluminum, and weighs about the same as the 520 fence. Rigidity is not an issue.

- Fence mounted.JPG (377.45 KiB) Viewed 20680 times
As for mounting it, basically all you have to do is mount the fore-aft rails underneath the table, as shown below at each each side of the SS OPR table. Quick, easy, and well-designed. Only the force of gravity on the rails is trying to pull those screws out of the table -- the actual fence-clamping force draws the rails up tightly against the underside of the table. The fence simply sits atop the table, clamped in place to the rails with screw knobs & sliding nuts. The rails each have adjustable scales that you can zero where you wish, and use to set fence displacement relative to the router bit. One useful trick I discovered is to loosen the fence-clamp knob on one side only, and then adjust it to twice the incremental fence offset I want. Presto, twice the fence-adjustment resolution, for half the work.

- Jessem rails mounted.JPG (376.19 KiB) Viewed 20680 times
Under time pressure on a honey-do project, I outsourced flattening, thicknessing, and straight-line edging of my secret-room ceiling paneling boards to a local lumberyard. Some red flags went off when discussing face-jointing for flatness prior to thickness-planing, but I reluctantly ignored them in the interest of time, and in deferring to a pro. Not a good decision. It turns out that the sawmill did NOT have some magical planer that would render the boards both flat and of even thickness. Indeed, their machine was a garden-variety Grizzly thickness planer. So my T&G lumber arrived nicely thicknessed, but not particularly flat. Even after much sorting on my part.
Enter the Jessem fence and Clear-Cut guides (purchased from my local Woodcraft store). I set up the guides to squish the boards flat against the table while milling the T&G. They can, and did, do that. And the fence was plenty stout. But the lovely knurled knobs that lock down the Clear-Cut guides wanted to slip when the humpy-board pressure got too high. Then I noticed that those nice knurled knobs have a hex ID to facilitate clamping down with a Allen key. And then I did so, very carefully, not wanting to damage the fence through gorilla T-nut force.
Well, I got the T&G milled onto those humpy board with near perfection. We’re talking to within 2-4 thousands of perfection here, and they draw up really nice and flat when mated. But my sub-gorilla clamp-knob torquing did deform the T-slot on the fence just ever so slightly. Merely annoying, not a real problem. Later, I bought some T-bolts that will spread the clamping force over a considerably larger area, so I don't expect this to be an on-going issue, even at gorillas torques.
The moral of that story is that if someone ever tries to tell you that rough lumber can be properly milled without face-jointing (or planer-sledding) as a first step, just walk away. I’d be time and money ahead if I had bought an 8” jointer for face-planing, and then thicknessed on my SS Pro Planer, with everything under my own control.
But that nice stout Jessem fence saved the day, and the Crapsman fence would have failed miserably at the squishing-the-boards-flat task.
That's still not all the cool things that Jessem fence can do for you. For example, I had instructed the lumberyard to err on the side of "wide" when straight-line edging the boards, as small defects on the board edges would be milled away when I added the T&G. But in the process of milling the T&G onto all that lumber, I encountered a board or two with un-straightened edge sections that were longer than the Jessem fence. These needed to be jointed before milling the T&G. However, my only working jointer was my dandy-but-small SS jointer, with a bed length not well-suited for jointing 8' boards. Jessem to the rescue, again. The Master Fence II comes with a pair of precision extruded rails that can be set to offset one fence face by either 1/16" or 1/32", IIRC. So I popped those in, re-jointed the board edges in question, and got nice straight flat edges. After milling the T&G, they mated up perfectly with the other boards.
Bonus #2: the Jessem fence quickly slides back or dismounts entirely for using overam router functions, such as making cool butterfly inlays.

- Opr Pattern Jig 1.jpg (426.63 KiB) Viewed 20680 times
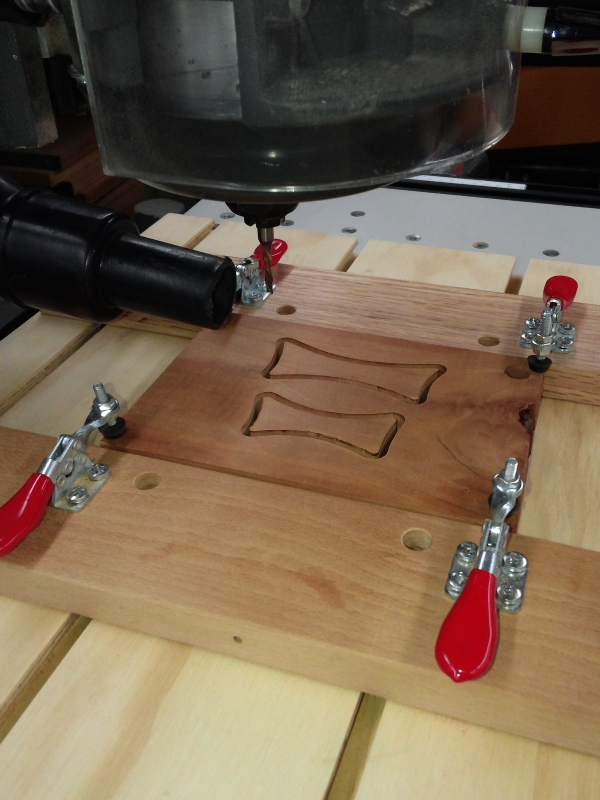
- OPR Pattern Jig.JPG (414.02 KiB) Viewed 20680 times
So overall, I highly recommend the Jessem fence. It’s a huge upgrade over the stock SS stand-alone OPR fence extrusions, and it helps turn the machine into a first-class conventional router table.