Page 1 of 2
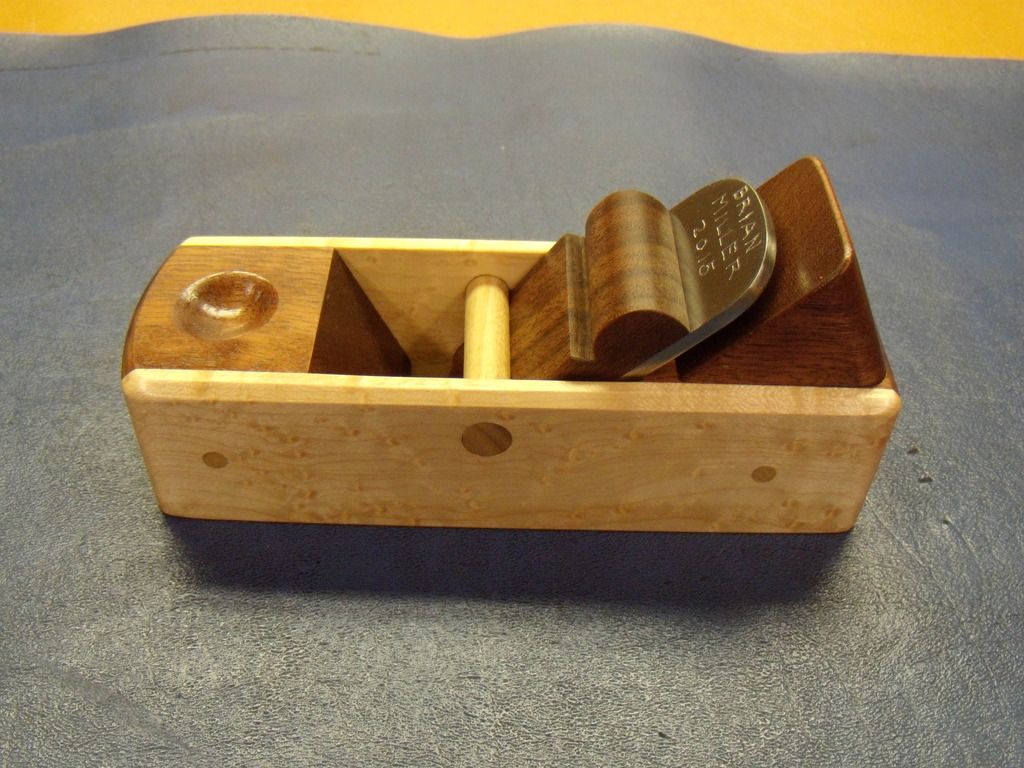
MY FIRST PLANE
Posted: Mon Sep 14, 2015 7:46 pm
by S Brian
A couple of years ago, I went to Charlotte Michigan to take John Wilson's Shaker Oval Box class and really enjoyed the learning from John. Link to his web site:
http://www.shakerovalbox.com/
Last year I bought John's book Making Wood Tools, so earlier this year, I decided to make the first project in his book, a block plane. The plans include all the information needed, plus how to make and heat treat the blade. Making the plane was relatively easy and it was a fun and useful project. The materials are Walnut and Birdseye Maple.
Re: MY FIRST PLANE
Posted: Mon Sep 14, 2015 7:48 pm
by algale
That's a work of art. If it works as well as it looks, you'll be in planing heaven.
Re: MY FIRST PLANE
Posted: Mon Sep 14, 2015 8:26 pm
by jsburger
Very very very very nice!!!!!
Re: MY FIRST PLANE
Posted: Mon Sep 14, 2015 8:34 pm
by JPG
Nicely done!!!
Re: MY FIRST PLANE
Posted: Mon Sep 14, 2015 8:53 pm
by nuhobby
Congrats, very beautiful! You may launch that down Hwy 31 to me, if you ever get tired of it!
Chris
Re: MY FIRST PLANE
Posted: Mon Sep 14, 2015 9:12 pm
by S Brian
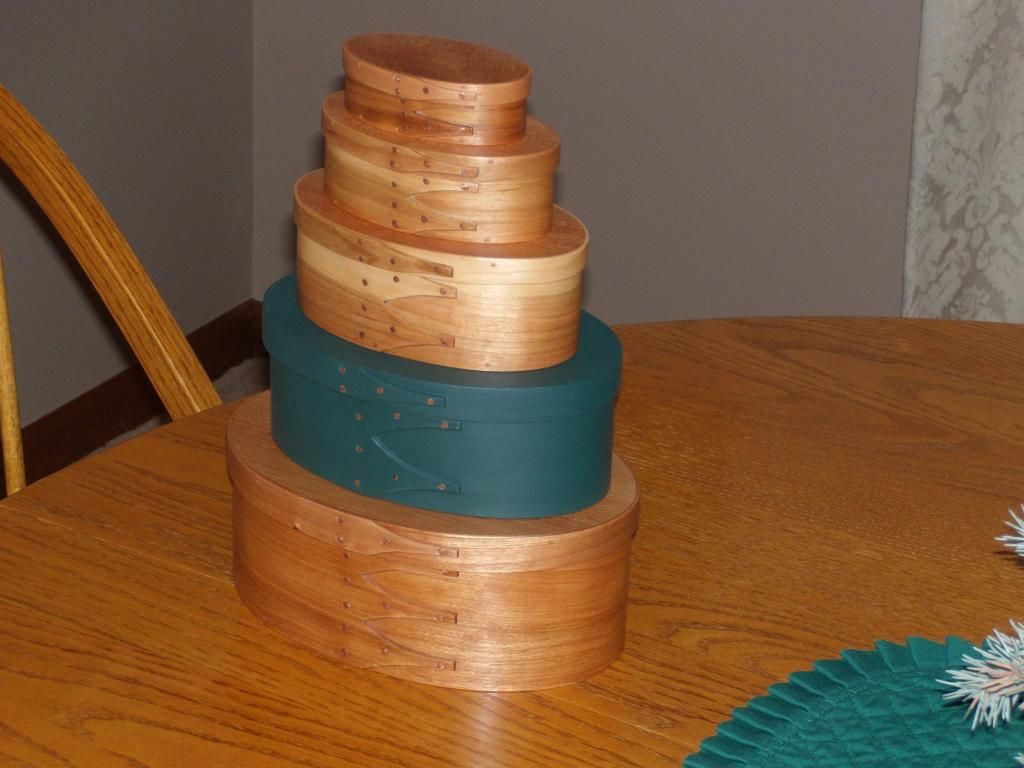
Thanks guys! Here is a picture of my Shaker Oval Boxes. The material is Cherry.
Re: MY FIRST PLANE
Posted: Mon Sep 14, 2015 9:13 pm
by Bruce
Very nice!
Re: MY FIRST PLANE
Posted: Mon Sep 14, 2015 9:16 pm
by roy_okc
Very nice plane and boxes. Congrats.
Re: MY FIRST PLANE
Posted: Tue Sep 15, 2015 12:27 am
by rjent
Good Lord you do good work!
Very nice!
Re: MY FIRST PLANE
Posted: Tue Sep 15, 2015 7:52 pm
by S Brian
rjent wrote:Good Lord you do good work!
Very nice!
Thanks rjent! All of the work on the block plane is mine, but I must give some credit to John Wilson for the boxes. The class at John's Home Shop consists of 3-hours on Friday evening and then all day on Saturday. John supplies all of the material and lunch on Saturday, all for $90. The bands for the boxes are supplied with the fingers already cut to shape. When taking the class, only some trimming with a Stanley knife is required to clean the finger edges at a slight angle. The Friday class time is used to trim the bands, soak them in 200° water, forming the bands to the cores and then clinching the copper tacks. The last step is to add the top and bottom shaper blocks and let the bands dry overnight. Saturday is spent in fitting the bottoms of the boxes and the tops of the lids and securing these with pegs (tooth picks). All that is required after the class is to sand and apply your choice of finish at home.
Every thing you need to know about making Shaker boxes is at John's web site (
http://www.shakerovalbox.com/), including supplies to make them at home. Here is a John's PDF guide to making Shaker boxes. makhttp://
www.shakerovalbox.com/wp-content/upload ... lBoxes.pdf

