Which arbor do I need
Moderators: HopefulSSer, admin

I would like to recommend that you cover the way tubes when you are buffing (a piece of cardboard would work) so the grit and compound does not land on them. This will save you trouble in the future.
________________________________________________________________________________________________
1981 Mark V 500, bandsaw, belt sander, jig saw, jointer; contractor's table saw; multiple circular saws and miter saws; and a trailer full of tools.
"It is better to remain silent and thought a fool than to speak out and remove all doubt"
Abraham Lincoln
1981 Mark V 500, bandsaw, belt sander, jig saw, jointer; contractor's table saw; multiple circular saws and miter saws; and a trailer full of tools.
"It is better to remain silent and thought a fool than to speak out and remove all doubt"
Abraham Lincoln
-
terrydowning
- Platinum Member
- Posts: 1678
- Joined: Mon Jul 19, 2010 3:26 pm
- Location: Windsor, CO
Never really thought about it. Thanks for the tip. In general I don't do a lot of buffing. It just happened that this topic came up when I was set up for buffing. I'm working on restoring some of my old hand planes.
--
Terry
Copy and paste the URLs into your browser if you want to see the photos.
1955 Shopsmith Mark 5 S/N 296860 Workshop and Tools
https://1drv.ms/i/s!AmpX5k8IhN7ahFCo9VvTDsCpoV_g
Public Photos of Projects
http://sdrv.ms/MaXNLX
Terry
Copy and paste the URLs into your browser if you want to see the photos.
1955 Shopsmith Mark 5 S/N 296860 Workshop and Tools
https://1drv.ms/i/s!AmpX5k8IhN7ahFCo9VvTDsCpoV_g
Public Photos of Projects
http://sdrv.ms/MaXNLX
Bump 
Terry, how's your 3 wheel assembly working out? I've been using a couple of single wheels on arbors and think I would like to step that up a bit.
Is the 1/2" all thread thick enough? I see that the commercially made units use 3/4 threaded rod; is that for ease of adaptation to a #2MT, or does this thing need the added strength to resist flexing / whip?
BTW, where did you buy the wheels, and would you buy them again or go for something different? I've been using a couple of cloth wheels from HF. I have no complaints, but I don't know what I don't know...
ETA: I took a look at one of the Beall setups at woodcraft. Their wheels are much thicker than the wheels I've got. Are generic versions of these thicker wheels available anywhere?
-
terrydowning
- Platinum Member
- Posts: 1678
- Joined: Mon Jul 19, 2010 3:26 pm
- Location: Windsor, CO
Sorry it took me a while to get to this, I've been unable to hit this forum for a bit and I'm just getting caught up.
Answers in blue below
Answers in blue below
Cavediver wrote:Bump
Terry, how's your 3 wheel assembly working out? I've been using a couple of single wheels on arbors and think I would like to step that up a bit.
Love it and use it often Typically on my smaller lathe. Because it fits, it lives in a drawer with my other buffing and abrasives right underneath and it's super easy to set up.
Is the 1/2" all thread thick enough? I see that the commercially made units use 3/4 threaded rod]I have not had any problems with the 1/2" all thread. Bufing is a finesse operation and you should not be pressing or leaning into the wheels. Let the compounds and the wheels do the work. I used 1/2" all thread because it was what I had laying around. The head stock is driven by either my collet chuck (pictured above) or a 1/2" drill chuck both work equally well for driving the buffing wheels. I drilled a 60 degree center on the tail stock side which is held in place by a 60 degree live center. With the PVC covers the rod appears to be 3/4" I recommend adding PVC covers if building your own. This prevents damage to your item if it slips and hits the rod. The PVC may also prevent the nuts on the left side of the wheel from loosening. I've never had any problems with loosening though.[/color]
BTW, where did you buy the wheels, and would you buy them again or go for something different? I've been using a couple of cloth wheels from HF. I have no complaints, but I don't know what I don't know...
I bought the wheels at Sears loose cotton 6", they're not the best but they work fine for me and the buffing I do. I'll buy higher quality wheels the next time around. The tripoli buffing wheel is a stitched wheel and very old (from Dad or Papa's inventory, same with the wheels pictured mounted on the SS) That is the great thing about buffing wheels and compounds, they last a very long time and are relatively inexpensive. If you sew you can male your own wheels.
ETA: I took a look at one of the Beall setups at woodcraft. Their wheels are much thicker than the wheels I've got. Are generic versions of these thicker wheels available anywhere?
I've heard great things about this company for buffing supplies but have not pulled the trigger on any purchases yet.
http://www.caswellplating.com/buffs/index.html
--
Terry
Copy and paste the URLs into your browser if you want to see the photos.
1955 Shopsmith Mark 5 S/N 296860 Workshop and Tools
https://1drv.ms/i/s!AmpX5k8IhN7ahFCo9VvTDsCpoV_g
Public Photos of Projects
http://sdrv.ms/MaXNLX
Terry
Copy and paste the URLs into your browser if you want to see the photos.
1955 Shopsmith Mark 5 S/N 296860 Workshop and Tools
https://1drv.ms/i/s!AmpX5k8IhN7ahFCo9VvTDsCpoV_g
Public Photos of Projects
http://sdrv.ms/MaXNLX
Thanks Terry.
With that in mind, I took a third look at some buffing supplies. After pricing out the thicker buffing wheels and compounds, I found the Peachtree Woodworking 3-buff kit to be a pretty reasonable price. I stopped in at lunch and picked it up. The wheels are nice, the 3/4 mandrel seems decent, and there's enough compound in the kit to last me for a long, long time. Even though the mandrel is set up for a #2MT, I can use my collet chuck to hold one end, or I can put it in storage for a time when I upgrade to a stand-alone lathe and use some DIY mandrels instead.
Collet chuck?
Oh yeah... I bought the PSI collet chuck last week. I'm seriously kicking myself for not getting it sooner. I needed a way to accurately hold a 3/4 mandrel, and my regular chuck wasn't getting the job done. THe collet chuck is doing a beautiful job, and it's going to be very helpful for several other operations.
I'll try to get this buffing system set up this weekend. I don't know much about finishing this way, but I'll do my best to write up an honest report.
With that in mind, I took a third look at some buffing supplies. After pricing out the thicker buffing wheels and compounds, I found the Peachtree Woodworking 3-buff kit to be a pretty reasonable price. I stopped in at lunch and picked it up. The wheels are nice, the 3/4 mandrel seems decent, and there's enough compound in the kit to last me for a long, long time. Even though the mandrel is set up for a #2MT, I can use my collet chuck to hold one end, or I can put it in storage for a time when I upgrade to a stand-alone lathe and use some DIY mandrels instead.
Collet chuck?
Oh yeah... I bought the PSI collet chuck last week
I'll try to get this buffing system set up this weekend. I don't know much about finishing this way, but I'll do my best to write up an honest report.
-
terrydowning
- Platinum Member
- Posts: 1678
- Joined: Mon Jul 19, 2010 3:26 pm
- Location: Windsor, CO
Buffing is actually a pretty simple way to get a great finish on items without the hassle and expense of excess sanding.
There a two basic "strokes" to use when buffing. Cut and Color
The "Cut Stroke" is performed by moving the object against the rotation of the wheel starting in the middle and working up. This is the more aggressive of the strokes and is used to remove abrasive scratches from the previous abrasive level.
The "Color" stroke is performed by moving the object the same direction as the rotation of the wheel start in the middle of the wheel and move toward the bottom.
Always have a firm grip on what you are buffing. Those strings/material can grab and fling objects easily.
There are literally dozens of compounds available. For general buffing I use three compounds, Tripoli, Whit Diamond, and a plastic compound (color varies n these). I also have a green metal compound (I use this for stropping edged tools) a Black Metal Compound for light rust removal and initial metal buffing.
Helpful hint. Only use one compound per wheel. wheels are relatively expensive and cleaning the previous compound is a real hassle.
What I typically do for highly finished items
Develop a thick layer of finish on the project to be buffed (sanding between coats/layers etc.)
Final sanding to around 400 or so (sometimes higher sometimes only lower depends on the project). Leave a uniform scratch pattern creating an even haze on the finish.
First wheel I use has Tripoli using a "cut stroke" the goal is to remove the sanding scratches from the sanding. The haze disappears and the finish has a more matte look to it. If you want a matte finish stop here.
When finished removing the haze, use a "color" stroke, this brings up the level of the shine (say semi gloss)
Next wheel is the White diamond.
Cut strokes to remove the scratches from the Tripoli and bring up the gloss.
Color Strokes make it shinier and prepare for the polishing on the next step.
Last wheel plastic polishing compound. (I also have a wheel for wax. Sometimes I'll use wax instead of the Plastic compound. Again it all depends on the project.) For polishing, use a color stoke only. Really no need for the cut stroke and the aggressiveness just strips the polish away.
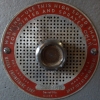
This is an example of the end result.
Cherry bowl from a board with 3 coats of rattle can gloss lacquer, dry sanded to 400 on the lathe.
Buffing regimen as described above.
Tripoli (cut and color)
WD (cut and color)
Blue plastic polish (color)
[ATTACH]24834[/ATTACH]
I really wish I had done a better job on the glue up of this bowl. It really shows with this high of a finish. This is the down side to a great finish. Every flaw in workmanship is magnified.
Good luck with it. I think buffing is the best method (Both speed and cost) for achieving highly polished finishes on smaller objects.
The collet chuck is pretty awesome especially for small items.
I use it for drilling pen blanks and other small cylinders when I need the highest accuracy. I drilled a 3/8 hole down a 1/2" once. Nerve wracking even with a collet chuck and pretty much impossible with any other traditional tools.
There a two basic "strokes" to use when buffing. Cut and Color
The "Cut Stroke" is performed by moving the object against the rotation of the wheel starting in the middle and working up. This is the more aggressive of the strokes and is used to remove abrasive scratches from the previous abrasive level.
The "Color" stroke is performed by moving the object the same direction as the rotation of the wheel start in the middle of the wheel and move toward the bottom.
Always have a firm grip on what you are buffing. Those strings/material can grab and fling objects easily.
There are literally dozens of compounds available. For general buffing I use three compounds, Tripoli, Whit Diamond, and a plastic compound (color varies n these). I also have a green metal compound (I use this for stropping edged tools) a Black Metal Compound for light rust removal and initial metal buffing.
Helpful hint. Only use one compound per wheel. wheels are relatively expensive and cleaning the previous compound is a real hassle.
What I typically do for highly finished items
Develop a thick layer of finish on the project to be buffed (sanding between coats/layers etc.)
Final sanding to around 400 or so (sometimes higher sometimes only lower depends on the project). Leave a uniform scratch pattern creating an even haze on the finish.
First wheel I use has Tripoli using a "cut stroke" the goal is to remove the sanding scratches from the sanding. The haze disappears and the finish has a more matte look to it. If you want a matte finish stop here.
When finished removing the haze, use a "color" stroke, this brings up the level of the shine (say semi gloss)
Next wheel is the White diamond.
Cut strokes to remove the scratches from the Tripoli and bring up the gloss.
Color Strokes make it shinier and prepare for the polishing on the next step.
Last wheel plastic polishing compound. (I also have a wheel for wax. Sometimes I'll use wax instead of the Plastic compound. Again it all depends on the project.) For polishing, use a color stoke only. Really no need for the cut stroke and the aggressiveness just strips the polish away.
This is an example of the end result.
Cherry bowl from a board with 3 coats of rattle can gloss lacquer, dry sanded to 400 on the lathe.
Buffing regimen as described above.
Tripoli (cut and color)
WD (cut and color)
Blue plastic polish (color)
[ATTACH]24834[/ATTACH]
I really wish I had done a better job on the glue up of this bowl. It really shows with this high of a finish. This is the down side to a great finish. Every flaw in workmanship is magnified.
Good luck with it. I think buffing is the best method (Both speed and cost) for achieving highly polished finishes on smaller objects.
The collet chuck is pretty awesome especially for small items.
I use it for drilling pen blanks and other small cylinders when I need the highest accuracy. I drilled a 3/8 hole down a 1/2" once. Nerve wracking even with a collet chuck and pretty much impossible with any other traditional tools.
- Attachments
-
- 2013-12-18 07.10.01.jpg (288.98 KiB) Viewed 3119 times
--
Terry
Copy and paste the URLs into your browser if you want to see the photos.
1955 Shopsmith Mark 5 S/N 296860 Workshop and Tools
https://1drv.ms/i/s!AmpX5k8IhN7ahFCo9VvTDsCpoV_g
Public Photos of Projects
http://sdrv.ms/MaXNLX
Terry
Copy and paste the URLs into your browser if you want to see the photos.
1955 Shopsmith Mark 5 S/N 296860 Workshop and Tools
https://1drv.ms/i/s!AmpX5k8IhN7ahFCo9VvTDsCpoV_g
Public Photos of Projects
http://sdrv.ms/MaXNLX