Headstock Reassembly Idler Shaft

Forum for Maintenance and Repair topics. Feel free to ask questions or contribute.

Moderators: HopefulSSer, admin

User avatar
JPG
Platinum Member
Posts: 34642
Joined: Wed Dec 10, 2008 7:42 pm
Location: Lexington, Ky (TAMECAT territory)

Headstock Reassembly Idler Shaft

Post by JPG »

This thread illustrates a method to insert the Idler Shaft/bearing/etc. in to a headstock being reassembled.
hsasmis1.jpg
hsasmis1.jpg (307.73 KiB) Viewed 6720 times
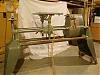
Position the bearing eccentric bushing onto the idler shaft bearing with the adjusting slot facing the end AWAY from the pulley. From the INSIDE of the headstock Slip the Drive belt(poly-v/Gilmer) onto the grooved/cogged pulley. For THIS vintage Poly-V belt the belt should be positioned so as to just cover the third GROOVE of the pulley on the drive shaft(upper)(there should be two GROOVES showing on the end of the drive pulley facing the quill handle etc.).

Rotate the eccentric bushing so the 'fat' side is towards the bottom of the headstock, and slide all this into the bore.
hsasmis3.jpg
hsasmis3.jpg (314.2 KiB) Viewed 6707 times
Notice the groove in the center of the bearing. This groove allows the set screw which has a cone shaped end to position the bearing in the eccentric sleeve and secure it. DO NOT overtighten this setscrew as it might apply too much pressure on to the bearing.
hsasmis4.jpg
hsasmis4.jpg (327.44 KiB) Viewed 6759 times
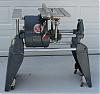
Slide the Control sheave onto the idler shaft. The shaft has a key and the sheave has a keyway slot which must be aligned. This would be a good time to lubricate the control sheave/shaft. Finally slip the Motor belt over the control sheave/shaft.

Check the alignment of the drive belt from pulley to pulley. SOME later Mark V require positioning the poly-v belt one more groove towards the rear.
hsasmis5.jpg
hsasmis5.jpg (310.7 KiB) Viewed 6894 times
If there was a screw/washer at the top of the idler shaft bore replace it and tighten. Snug the bolt securing the eccentric bushing. If adjusting the drive belt tension now, rotate the eccentric bushing until slight pressure deflects the drive belt about 1/4". This pix shows the eccentric bushing before tensioning drive belt.

This thread is intended to be ONE of several showing reassembly of a disassembled headstock. A single thread titled Headstock Reassembly http://www.shopsmith.net/forums/showthr ... t=3765will link to all of the threads These threads will be edited as necessary to correct any errors or confusion.
╔═══╗
╟JPG ╢
╚═══╝

Goldie(Bought New SN 377425)/4" jointer/6" beltsander/12" planer/stripsander/bandsaw/powerstation /Scroll saw/Jig saw /Craftsman 10" ras/Craftsman 6" thicknessplaner/ Dayton10"tablesaw(restoredfromneighborstrashpile)/ Mark VII restoration in 'progress'/ 10
E[/size](SN E3779) restoration in progress, a 510 on the back burner and a growing pile of items to be eventually returned to useful life. - aka Red Grange
User avatar
bigjohn1
Gold Member
Posts: 40
Joined: Sun May 16, 2010 12:09 am
Location: Canada

Pics

Post by bigjohn1 »

You have some great pics on parts just great.
I just bought a 1956 greenie how does that front bearing come out I dont see that keeper spring like the knewer ones.

Quill back bearing has some play or movement it is less the 3 to 4 inch from the end this bearing does that mean there is two bearings?
Mark V 500
Bandsaw
Jointer
Jigsaw
Belt Sander Now a 1956 greenie
User avatar
JPG
Platinum Member
Posts: 34642
Joined: Wed Dec 10, 2008 7:42 pm
Location: Lexington, Ky (TAMECAT territory)

Post by JPG »

bigjohn1 wrote:You have some great pics on parts just great.
I just bought a 1956 greenie how does that front bearing come out I dont see that keeper spring like the knewer ones.

Quill back bearing has some play or movement it is less the 3 to 4 inch from the end this bearing does that mean there is two bearings?

The quill does not have a 'back bearing', but has a spacer that holds the quill spline shaft near the center to aid in assembling the quill into the main drive shaft.

Not sure what you are referring to as 'that front bearing'. If the main drive shaft, there should be one there. However it is not necessary to remove it as the shaft/bearings will slide to the rear and out.

P.S. If you are referring to the ring at the back holding the bearing in, the ring and the pry groove are difficult to see(especially if crud present).
╔═══╗
╟JPG ╢
╚═══╝

Goldie(Bought New SN 377425)/4" jointer/6" beltsander/12" planer/stripsander/bandsaw/powerstation /Scroll saw/Jig saw /Craftsman 10" ras/Craftsman 6" thicknessplaner/ Dayton10"tablesaw(restoredfromneighborstrashpile)/ Mark VII restoration in 'progress'/ 10
E[/size](SN E3779) restoration in progress, a 510 on the back burner and a growing pile of items to be eventually returned to useful life. - aka Red Grange
User avatar
bigjohn1
Gold Member
Posts: 40
Joined: Sun May 16, 2010 12:09 am
Location: Canada

quill

Post by bigjohn1 »

This quill on the greenie has a shine to it not just black.
I just thought some had dual bearing and some had one on this one from the spline looking down in I can see a bearing about 3 inch inside some play but runs smooth. The fellow before me changed the gilmore belt but couldn't get it to run. I line everything up and now it runs pretty good could use a porkchop to work even smoother speed runs up really well snags a bit going down. Run good not like new but good.

Now as you can see some paint and the big part the tubes need cleaning.

Thanks JP Someone told me forget the rest go with the 510 and above then upgrade to the 520.
I must say the 520 looks space age cool.

Ok back to headstock sorry.
Mark V 500
Bandsaw
Jointer
Jigsaw
Belt Sander Now a 1956 greenie
User avatar
JPG
Platinum Member
Posts: 34642
Joined: Wed Dec 10, 2008 7:42 pm
Location: Lexington, Ky (TAMECAT territory)

Post by JPG »

bigjohn1 wrote:This quill on the greenie has a shine to it not just black.
I just thought some had dual bearing and some had one on this one from the spline looking down in I can see a bearing about 3 inch inside some play but runs smooth. The fellow before me changed the gilmore belt but couldn't get it to run. I line everything up and now it runs pretty good could use a porkchop to work even smoother speed runs up really well snags a bit going down. Run good not like new but good.

Now as you can see some paint and the big part the tubes need cleaning.

Thanks JP Someone told me forget the rest go with the 510 and above then upgrade to the 520.
I must say the 520 looks space age cool.

Ok back to headstock sorry.
The 'Shopsmith Inc.'(Mark V...) have most parts black oxidized. The earlier versions(Mark 5) had very few and almost all had a raw steel 'finish'.
╔═══╗
╟JPG ╢
╚═══╝

Goldie(Bought New SN 377425)/4" jointer/6" beltsander/12" planer/stripsander/bandsaw/powerstation /Scroll saw/Jig saw /Craftsman 10" ras/Craftsman 6" thicknessplaner/ Dayton10"tablesaw(restoredfromneighborstrashpile)/ Mark VII restoration in 'progress'/ 10
E[/size](SN E3779) restoration in progress, a 510 on the back burner and a growing pile of items to be eventually returned to useful life. - aka Red Grange
User avatar
billmayo
Platinum Member
Posts: 2342
Joined: Fri Jul 21, 2006 3:31 pm
Location: Plant City, FL

Idler Shaft & Eccentric Bushing

Post by billmayo »

JPG40504 wrote:Check the alignment of the drive belt from pulley to pulley. SOME later Mark V require positioning the poly-v belt one more groove towards the rear.

[ATTACH]4981[/ATTACH]

If there was a screw/washer at the top of the idler shaft bore replace it and tighten. Snug the bolt securing the eccentric bushing. If adjusting the drive belt tension now, rotate the eccentric bushing until slight pressure deflects the drive belt about 1/4". This pix shows the eccentric bushing before tensioning drive belt.
Thanks for the excellant pictures. This really helps to answer most questions on this forum.

Just a quick note: I always replace the eccentric bushing washer with a body washer (larger OD) to prevent the bearing from moving outward from the eccentric bushing. Some eccentric bushings have no set screw or the set screw can loosen over time.
Bill Mayo bill.mayo@verizon.net
Shopsmith owner since 73. Sell, repair and rebuild Shopsmith, Total Shop & Wood Master headstocks, SPTs, attachments, accessories and parts. US Navy 1955-1975 (FTCS/E-8)
User avatar
mmorris
Gold Member
Posts: 90
Joined: Sun Dec 27, 2009 9:45 pm
Location: Missouri

idler shaft reassembly

Post by mmorris »

I'm reassembling and old greenie that has the clamp bolt holding the eccentric bearing in place. The eccentric bearing should be installed flush with outside of the headstock casting correct? On mine, if it is installed flush I can't get the Gilmer belt to keep from riding right against the idler shaft bearing and the inner drive sleave bearing. Shouldn't it ride in the more to the inside? If so, how can it be adjusted? I have adjusted the belt tension to about 1/4 inch deflection. Thanks.
Monte in Missouri
Two 1954 Mark V's: #268502 and #267199
User avatar
mmorris
Gold Member
Posts: 90
Joined: Sun Dec 27, 2009 9:45 pm
Location: Missouri

idler shaft reassembly

Post by mmorris »

BTW, on the above greenie, when the clamp bolt is tightened securely (I know you're not supposed to tighten it a lot or the casting will crack), the eccentric bearing keepers are not tight; they are loose and seem that they will rattle when the machine is running. Is this correct?
Monte in Missouri
Two 1954 Mark V's: #268502 and #267199
User avatar
JPG
Platinum Member
Posts: 34642
Joined: Wed Dec 10, 2008 7:42 pm
Location: Lexington, Ky (TAMECAT territory)

Post by JPG »

mmorris wrote:BTW, on the above greenie, when the clamp bolt is tightened securely (I know you're not supposed to tighten it a lot or the casting will crack), the eccentric bearing keepers are not tight]Is this correct?[/B]
Yes!!!!!!!!!!!!!!!!!!!
╔═══╗
╟JPG ╢
╚═══╝

Goldie(Bought New SN 377425)/4" jointer/6" beltsander/12" planer/stripsander/bandsaw/powerstation /Scroll saw/Jig saw /Craftsman 10" ras/Craftsman 6" thicknessplaner/ Dayton10"tablesaw(restoredfromneighborstrashpile)/ Mark VII restoration in 'progress'/ 10
E[/size](SN E3779) restoration in progress, a 510 on the back burner and a growing pile of items to be eventually returned to useful life. - aka Red Grange
User avatar
JPG
Platinum Member
Posts: 34642
Joined: Wed Dec 10, 2008 7:42 pm
Location: Lexington, Ky (TAMECAT territory)

Post by JPG »

mmorris wrote:I'm reassembling and old greenie that has the clamp bolt holding the eccentric bearing in place. The eccentric bearing should be installed flush with outside of the headstock casting correct? On mine, if it is installed flush I can't get the Gilmer belt to keep from riding right against the idler shaft bearing and the inner drive sleave bearing. Shouldn't it ride in the more to the inside? If so, how can it be adjusted? I have adjusted the belt tension to about 1/4 inch deflection. Thanks.
It rides very close!

Could you post a couple of pix?
╔═══╗
╟JPG ╢
╚═══╝

Goldie(Bought New SN 377425)/4" jointer/6" beltsander/12" planer/stripsander/bandsaw/powerstation /Scroll saw/Jig saw /Craftsman 10" ras/Craftsman 6" thicknessplaner/ Dayton10"tablesaw(restoredfromneighborstrashpile)/ Mark VII restoration in 'progress'/ 10
E[/size](SN E3779) restoration in progress, a 510 on the back burner and a growing pile of items to be eventually returned to useful life. - aka Red Grange
Post Reply