Some time ago Bill Mayo posted a tutorial on how to install a switch to reverse the SS head stock. Does anyone know how I could locate it?
Thanks,
Tom
BILL MAYO INSTRUCTIONS
Moderators: HopefulSSer, admin
-
ERLover
- Platinum Member
- Posts: 3914
- Joined: Mon Aug 31, 2015 10:19 pm
- Location: Greenie and Goldie Country not to metion the WI Badgers!
Re: BILL MAYO INSTRUCTIONS
KNOWLEDGE AND EXPERIENCE EQUALS WISDOM. Albert Einstein
The Greatness officially starts
Greenie, Grayling, SS stand alone BS and BS SPT, jointer and belt sander, 3 Ers with Speed Changers. I think those 3 cover my ER needs, and space for them.
The Greatness officially starts
Greenie, Grayling, SS stand alone BS and BS SPT, jointer and belt sander, 3 Ers with Speed Changers. I think those 3 cover my ER needs, and space for them.
-
UncleSnick

- Gold Member
- Posts: 37
- Joined: Mon Apr 07, 2014 8:36 am
- Location: Bethelehm, PA Nick's 'Nuthin Fancy'
Re: BILL MAYO INSTRUCTIONS
I recently did a reverse job. JoshH took Bill's work and expanded on it. It was excellent.
See link: https://www.shopsmith.com/ss_forum/view ... 97#p144297
Also, EverettDavis provided a schematic which, to me, was the only thing missing from the work of Bill Mayo and JoshH. The only thing I would add to Everett's schematic is that my motor has 2 sets of run windings.
See Link: http://www.shopsmith.com/ss_forum/viewt ... 44#p221344
This should be everything you need. Feel free to post or PM me with any questions. - Nick
Last edited by UncleSnick on Thu Jan 19, 2017 6:39 pm, edited 1 time in total.
My shop is my time machine. I go there and lose all sense of time!
Greenie Serial 293128 March 1955
Greenie Serial 300735 August 1955 - Bad shape, future restoration project.
Grey Serial SS102778 Sept 1981 - Reversible shorty SPT driver.
Grey Serial SS168100 Feb 1984
Band saw Serial SS48432 Sept 1981
4" Jointer Serial SS91521 Nov 1985
Jigsaw Serial 33556 Jan 1984
Greenie Serial 293128 March 1955
Greenie Serial 300735 August 1955 - Bad shape, future restoration project.
Grey Serial SS102778 Sept 1981 - Reversible shorty SPT driver.
Grey Serial SS168100 Feb 1984
Band saw Serial SS48432 Sept 1981
4" Jointer Serial SS91521 Nov 1985
Jigsaw Serial 33556 Jan 1984
-
UncleSnick
- Gold Member
- Posts: 37
- Joined: Mon Apr 07, 2014 8:36 am
- Location: Bethelehm, PA Nick's 'Nuthin Fancy'
Re: BILL MAYO INSTRUCTIONS
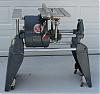
Here are a few pictures of the switch location I selected. It is out of the way and not likely to get bumped inadvertently. The wire routing inside the head is clear of the quill and quadrant movements.
- Attachments
-
- Hole Layout and start
- IMG_5141.jpg (51.95 KiB) Viewed 7419 times
-
- Switch is centered with the speed control
- IMG_5142.jpg (87.36 KiB) Viewed 7419 times
-
- Corner holes drilled. I used protection to keep the grindings out of the speed control and to keep me from scratching the face of the head with the dremel.
- IMG_5145.jpg (42.48 KiB) Viewed 7419 times
-
- Hole finished, wires pulled trough ready for switch.
- IMG_5147.jpg (77.47 KiB) Viewed 7419 times
-
- Finished switch install
- IMG_5149.jpg (50.55 KiB) Viewed 7419 times
My shop is my time machine. I go there and lose all sense of time!
Greenie Serial 293128 March 1955
Greenie Serial 300735 August 1955 - Bad shape, future restoration project.
Grey Serial SS102778 Sept 1981 - Reversible shorty SPT driver.
Grey Serial SS168100 Feb 1984
Band saw Serial SS48432 Sept 1981
4" Jointer Serial SS91521 Nov 1985
Jigsaw Serial 33556 Jan 1984
Greenie Serial 293128 March 1955
Greenie Serial 300735 August 1955 - Bad shape, future restoration project.
Grey Serial SS102778 Sept 1981 - Reversible shorty SPT driver.
Grey Serial SS168100 Feb 1984
Band saw Serial SS48432 Sept 1981
4" Jointer Serial SS91521 Nov 1985
Jigsaw Serial 33556 Jan 1984
-
everettdavis

- Platinum Member
- Posts: 2162
- Joined: Thu Jul 17, 2014 11:49 am
- Location: Lubbock, TX
Re: BILL MAYO INSTRUCTIONS
The purpose of my post at the time was illustration opposed to schematic representation. As it stated in the post "Here is a graphic that may help visualize them in a manner that is helpful for most"UncleSnick wrote:I recently did a reverse job. JoshH took Bill's work and expanded on it. It was excellent.
See link: https://www.shopsmith.com/ss_forum/view ... 97#p144297
Also, EverettDavis provided a schematic which, to me, was the only thing missing from the work of Bill Mayo and JoshH. The only thing I would add to Everett's schematic is that my motor has 2 sets of run windings.
See Link: http://www.shopsmith.com/ss_forum/viewt ... 44#p221344
This should be everything you need. Feel free to post or PM me with any questions. - Nick
There are two run windings as you have noted. JPG also noted it as well in his response in my post. Here is a revised graphic accordingly.
- Circuit to Motor with 2 Run Windings.png (54.81 KiB) Viewed 7312 times
I will post one of those below, and will if folks here desire me to, document other motors in the same manner from a wiring diagram point of view in coming months.
Bill Mayo and JoshH indeed truly did an excellent job in defining and documenting how to reverse the motor, which I have yet to address.
I know that all of us have Bill Mayo and his wife Ann in our thoughts and prayers at this time. Bill is a great man, noble, honorable, generous, and thoughtful.
Again, this is posted for the style of document I might prepare for other models. This is but one of the three types of motors in the Mark VII. I created and added a schematic representation of the external motor start relay within the relay body for helping folks understand the relay circuit. I will do one for the Mark 5 and Mark V motors if it will help folks.
Everett
- 501210.png (239.37 KiB) Viewed 7320 times
-
JPG

- Platinum Member
- Posts: 34651
- Joined: Wed Dec 10, 2008 7:42 pm
- Location: Lexington, Ky (TAMECAT territory)
Re: BILL MAYO INSTRUCTIONS
Schematic drawings and wiring diagrams are both valid aids with differing intent. The schematic is for understanding, the wiring is for (re)assembly.
Rarely do they cross purpose each other.
Do proceed Everett.
Rarely do they cross purpose each other.
Do proceed Everett.
╔═══╗
╟JPG ╢
╚═══╝
Goldie(Bought New SN 377425)/4" jointer/6" beltsander/12" planer/stripsander/bandsaw/powerstation /Scroll saw/Jig saw /Craftsman 10" ras/Craftsman 6" thicknessplaner/ Dayton10"tablesaw(restoredfromneighborstrashpile)/ Mark VII restoration in 'progress'/ 10E[/size](SN E3779) restoration in progress, a 510 on the back burner and a growing pile of items to be eventually returned to useful life. - aka Red Grange
Re: BILL MAYO INSTRUCTIONS
I found something strange with the six or so MK VII motors I rebuilt. I found that one run winding (3-4 ohms) was connected in parallel to the start winding (6-8 ohms) and the other run winding (3-4 ohms) was used for the start circuit. During the rebuild, I connected the run windings in parallel and used the start winding to start the motor without an problems. The motors operated OK with either of the above connections. I used a 2 switch setup to replace the MK VII push button switch. Has anyone else measured the run and start windings on any MK VII motors to see if I maybe I got some miswired motors. I never measured the different in output power between the 2 different wired motors.
-
JPG
- Platinum Member
- Posts: 34651
- Joined: Wed Dec 10, 2008 7:42 pm
- Location: Lexington, Ky (TAMECAT territory)
Re: BILL MAYO INSTRUCTIONS
Was the windings wire size different as is typical? If so I say miswired.billmayo wrote:I found something strange with the six or so MK VII motors I rebuilt. I found that one run winding (3-4 ohms) was connected in parallel to the start winding (6-8 ohms) and the other run winding (3-4 ohms) was used for the start circuit. During the rebuild, I connected the run windings in parallel and used the start winding to start the motor without an problems. The motors operated OK with either of the above connections. I used a 2 switch setup to replace the MK VII push button switch. Has anyone else measured the run and start windings on any MK VII motors to see if I maybe I got some miswired motors. I never measured the different in output power between the 2 different wired motors.
╔═══╗
╟JPG ╢
╚═══╝
Goldie(Bought New SN 377425)/4" jointer/6" beltsander/12" planer/stripsander/bandsaw/powerstation /Scroll saw/Jig saw /Craftsman 10" ras/Craftsman 6" thicknessplaner/ Dayton10"tablesaw(restoredfromneighborstrashpile)/ Mark VII restoration in 'progress'/ 10E[/size](SN E3779) restoration in progress, a 510 on the back burner and a growing pile of items to be eventually returned to useful life. - aka Red Grange
╟JPG ╢
╚═══╝
Goldie(Bought New SN 377425)/4" jointer/6" beltsander/12" planer/stripsander/bandsaw/powerstation /Scroll saw/Jig saw /Craftsman 10" ras/Craftsman 6" thicknessplaner/ Dayton10"tablesaw(restoredfromneighborstrashpile)/ Mark VII restoration in 'progress'/ 10E[/size](SN E3779) restoration in progress, a 510 on the back burner and a growing pile of items to be eventually returned to useful life. - aka Red Grange