New entry door
Moderators: HopefulSSer, admin
-
wannabewoodworker

- Platinum Member
- Posts: 626
- Joined: Mon Feb 15, 2010 11:36 am
- Location: Milford, CT
New entry door
I have been putting it off for a long time but our front entry door has finally deteriorated to the point that it needs to be replaced. The old one is a split farm style door that has been slowly going south for many years. The house is very old and the front entry way needs a lot of work but I don't have the time or resources to fix everything that needs fixing with that. The biggest problem is that the front entry is not plumb or level so i will have to do some serious modifications to the framing to get the pre-hung fiberglass door i purchased to fit. The new door is 38" x 82" and the existing opening is 37 3/8" x 81" approximately. This is going to be interesting to say the least as I don't really have any experience doing something as extensive as this. I am excited to do it but I know it is going to take me all weekend to do it I am sure. Wish me luck as this is going to be a heck of project for me. I will try and post some pics of the whole process and post back on my progress over the weekend.
Michael Mayo
Senior IT Support Engineer
Soft Designs Inc.
albiemanmike@gmail.com
1960's SS Mark VII, 1954 Greenie, 1983 Mark V, Jointer, Bandsaw, Jigsaw, Dewalt Slider, Delta Super 10, Delta 8" Grinder, Craftsman compressor, Drill Doctor, Kreg PH Jig, Bosch Jigsaw, Craftsman Router and Table...........and adding more all the time....
-
JPG

- Platinum Member
- Posts: 34651
- Joined: Wed Dec 10, 2008 7:42 pm
- Location: Lexington, Ky (TAMECAT territory)
wannabewoodworker wrote:I have been putting it off for a long time but our front entry door has finally deteriorated to the point that it needs to be replaced. The old one is a split farm style door that has been slowly going south for many years. The house is very old and the front entry way needs a lot of work but I don't have the time or resources to fix everything that needs fixing with that. The biggest problem is that the front entry is not plumb or level so i will have to do some serious modifications to the framing to get the pre-hung fiberglass door i purchased to fit. The new door is 38" x 82" and the existing opening is 37 3/8" x 81" approximately. This is going to be interesting to say the least as I don't really have any experience doing something as extensive as this. I am excited to do it but I know it is going to take me all weekend to do it I am sure. Wish me luck as this is going to be a heck of project for me. I will try and post some pics of the whole process and post back on my progress over the weekend.
"A" weekend? As in one?:D
╔═══╗
╟JPG ╢
╚═══╝
Goldie(Bought New SN 377425)/4" jointer/6" beltsander/12" planer/stripsander/bandsaw/powerstation /Scroll saw/Jig saw /Craftsman 10" ras/Craftsman 6" thicknessplaner/ Dayton10"tablesaw(restoredfromneighborstrashpile)/ Mark VII restoration in 'progress'/ 10E[/size](SN E3779) restoration in progress, a 510 on the back burner and a growing pile of items to be eventually returned to useful life. - aka Red Grange
-
Ed in Tampa

- Platinum Member
- Posts: 5830
- Joined: Fri Jul 21, 2006 12:45 am
- Location: North Tampa Bay area Florida
Most new doors are prehung so I assume your is.wannabewoodworker wrote:I have been putting it off for a long time but our front entry door has finally deteriorated to the point that it needs to be replaced. The old one is a split farm style door that has been slowly going south for many years. The house is very old and the front entry way needs a lot of work but I don't have the time or resources to fix everything that needs fixing with that. The biggest problem is that the front entry is not plumb or level so i will have to do some serious modifications to the framing to get the pre-hung fiberglass door i purchased to fit. The new door is 38" x 82" and the existing opening is 37 3/8" x 81" approximately. This is going to be interesting to say the least as I don't really have any experience doing something as extensive as this. I am excited to do it but I know it is going to take me all weekend to do it I am sure. Wish me luck as this is going to be a heck of project for me. I will try and post some pics of the whole process and post back on my progress over the weekend.
BIG SECRET! Make sure before you drive a nail, screw or anything else into the new door frame that the bottom threshhold is perfectly level. PERFECTLY LEVEL. And no you can not use any part of the new door frame to pull it into level. It must be LEVEL. So shim, chisel whatever it takes to get it level before you do anything else. Word of advice from hard learned lessons.
Once it is level shim the perimeter of the door frame to make sure nothing is pulled or pushed as you drive home the holding screws/nails. Make sure you check for equal gap all away around the door.
Once more MAKE SURE THE BOTTOM THRESHOLD IS LEVEL. If you try to pull the door level by the door frame you will have such a mess you will hate yourself.
Did I say make sure the bottom threshold of the new door sets level in the opening?
Ed in Tampa
Stay out of trouble!
Stay out of trouble!
-
JPG
- Platinum Member
- Posts: 34651
- Joined: Wed Dec 10, 2008 7:42 pm
- Location: Lexington, Ky (TAMECAT territory)
Ed in Tampa wrote:Most new doors are prehung so I assume your is.
BIG SECRET! Make sure before you drive a nail, screw or anything else into the new door frame that the bottom threshhold is perfectly level. PERFECTLY LEVEL. And no you can not use any part of the new door frame to pull it into level. It must be LEVEL. So shim, chisel whatever it takes to get it level before you do anything else. Word of advice from hard learned lessons.
Once it is level shim the perimeter of the door frame to make sure nothing is pulled or pushed as you drive home the holding screws/nails. Make sure you check for equal gap all away around the door.
Once more MAKE SURE THE BOTTOM THRESHOLD IS LEVEL. If you try to pull the door level by the door frame you will have such a mess you will hate yourself.
Did I say make sure the bottom threshold of the new door sets level in the opening?
Did you notice he said to make sure EVERY attachment point is shimmed before any attachment commences.
That is the easy part.
Enlarging the rough opening is your real challenge!!!!!!!!!!!!!!!! Make sure you get that right!!!!!! Then follow Ed's advice.
You do have a sawzall or equivalent with a nail cutting blade!!! A pry bar(the bigger the better) will be useful also.
I am guessing plaster walls, not drywall. That can add a bit of extra 'complexity'!
Hope the weather co-operates tonight!:)
╔═══╗
╟JPG ╢
╚═══╝
Goldie(Bought New SN 377425)/4" jointer/6" beltsander/12" planer/stripsander/bandsaw/powerstation /Scroll saw/Jig saw /Craftsman 10" ras/Craftsman 6" thicknessplaner/ Dayton10"tablesaw(restoredfromneighborstrashpile)/ Mark VII restoration in 'progress'/ 10E[/size](SN E3779) restoration in progress, a 510 on the back burner and a growing pile of items to be eventually returned to useful life. - aka Red Grange
╟JPG ╢
╚═══╝
Goldie(Bought New SN 377425)/4" jointer/6" beltsander/12" planer/stripsander/bandsaw/powerstation /Scroll saw/Jig saw /Craftsman 10" ras/Craftsman 6" thicknessplaner/ Dayton10"tablesaw(restoredfromneighborstrashpile)/ Mark VII restoration in 'progress'/ 10E[/size](SN E3779) restoration in progress, a 510 on the back burner and a growing pile of items to be eventually returned to useful life. - aka Red Grange
-
Ed in Tampa
- Platinum Member
- Posts: 5830
- Joined: Fri Jul 21, 2006 12:45 am
- Location: North Tampa Bay area Florida
-
judaspre1982
- Platinum Member
- Posts: 1237
- Joined: Tue Jul 08, 2008 10:10 pm
========================
Last edited by judaspre1982 on Fri May 05, 2017 1:38 pm, edited 1 time in total.
-
JPG
- Platinum Member
- Posts: 34651
- Joined: Wed Dec 10, 2008 7:42 pm
- Location: Lexington, Ky (TAMECAT territory)
judaspre1982 wrote: . . .
Hope you have a good helper.
Waiting for pics.
Dave
NOT the guy that helped with the shed!!!;)
╔═══╗
╟JPG ╢
╚═══╝
Goldie(Bought New SN 377425)/4" jointer/6" beltsander/12" planer/stripsander/bandsaw/powerstation /Scroll saw/Jig saw /Craftsman 10" ras/Craftsman 6" thicknessplaner/ Dayton10"tablesaw(restoredfromneighborstrashpile)/ Mark VII restoration in 'progress'/ 10E[/size](SN E3779) restoration in progress, a 510 on the back burner and a growing pile of items to be eventually returned to useful life. - aka Red Grange
╟JPG ╢
╚═══╝
Goldie(Bought New SN 377425)/4" jointer/6" beltsander/12" planer/stripsander/bandsaw/powerstation /Scroll saw/Jig saw /Craftsman 10" ras/Craftsman 6" thicknessplaner/ Dayton10"tablesaw(restoredfromneighborstrashpile)/ Mark VII restoration in 'progress'/ 10E[/size](SN E3779) restoration in progress, a 510 on the back burner and a growing pile of items to be eventually returned to useful life. - aka Red Grange
-
wannabewoodworker
- Platinum Member
- Posts: 626
- Joined: Mon Feb 15, 2010 11:36 am
- Location: Milford, CT
Hilarious replies i should have read these yesterday when I was ready to shoot myself at 7:30 pm. dripping with sweat and not seeing any light at the end of the tunnel. But today dawned a new day and a quick phone call to another forum member from another site who does this stuff for a living got me calmed down and back on track. The biggest problem I had with this project was that the house is very old and as such there isn't anything that is plumb or level plus it has had several battles with termites over the years before my wife and I moved in here with my now deceased father. We don't own the house and we try very hard not to put any money into it that isn't absolutely necessary. If we owned the house it would be entirely different but we don't and it is in a trust for another family member who is no longer living here with us and that is as far as i will go on the boring story.
The front door has been a real thorn in our side for several years and has been deteriorating steadily downwards. In the past month it had become almost impossible to close and the wife could not close or open it which would elicit very loud four letter words from that part of the house so I was forced into action. I had never messed with anything this involved before but felt I had the ability to tackle it as long as I took my time and did it right and also had someone to talk to/call in case I got in a jamb.
I got the old door and frame out without much fuss or muss as I do have a sawzall that no self respecting carpentry hack would leave home without. So the old came out easy. Now putting in the new wasn't nearly so easy or straight forward. There was some termite damaged trim and such underneath some other trim that needed to be replaced which wasn't a big deal but the biggest issue which really had me flumuxed was the fact that the header was higher on the hinge side of the door then on the handle side. I got the door all in and shimmed up and it even opened and closed beautifully but I did not like the fact that I had little if any gap between the door and the frame at the upper right corner looking from inside the house which is the handle side of the door. If the door expanded/swelled at all i was going to be in trouble. But it was now almost 7:30 pm. on Saturday and i was dead tired and needed some rest so i just put the door in temporarily for the night to keep the bugs out and went to bed.
Today i got up refreshed and ready to tackle the problem. I called a friend in NJ who replied to a post I made on another website I frequent. He does this for a living and although he could not come up and help me in person he was more than willing to talk me through anything and boost my confidence. As it turns out his advice was the same thing I already had thought about doing but felt better coming from a pro. So I snapped a line from the high side of the header to the low side nice and level and then took my circular saw and sawzall and cut a nice slice out of the header to make even across the top. Then I put the door back in and shimmed it all up and she opened and closed perfectly, my gaps were where they needed to be and i was relatively level and plumb all the way around. So I drove home screws around the jamb and the outside face and then went about the job of trimming it all out to cover up all the ugliness underneath. I am as happy as I could have possibly dreamed with the way it all came out considering I had absolutely NO experience with anything like this before. I only have to do some caulking and painting on the outside and then do some finish trim work on the inside to make it presentable. The wife is extremely happy and somewhat surprised at my accomplishment. I don't think she thought I was going to be able to get this project done by myself but I guess a surprised her..............
Truth be told I really surprised myself and I am feeling a little proud as i sit here in the lounger typing this out but then again there is always something else that needs doing that I have never done before so there are many mountains still to conquer but this particular mountain has been summited and beaten...............WoooooHoooooo!!!
Michael Mayo
Senior IT Support Engineer
Soft Designs Inc.
albiemanmike@gmail.com
1960's SS Mark VII, 1954 Greenie, 1983 Mark V, Jointer, Bandsaw, Jigsaw, Dewalt Slider, Delta Super 10, Delta 8" Grinder, Craftsman compressor, Drill Doctor, Kreg PH Jig, Bosch Jigsaw, Craftsman Router and Table...........and adding more all the time....
Senior IT Support Engineer
Soft Designs Inc.
albiemanmike@gmail.com
1960's SS Mark VII, 1954 Greenie, 1983 Mark V, Jointer, Bandsaw, Jigsaw, Dewalt Slider, Delta Super 10, Delta 8" Grinder, Craftsman compressor, Drill Doctor, Kreg PH Jig, Bosch Jigsaw, Craftsman Router and Table...........and adding more all the time....
-
wannabewoodworker
- Platinum Member
- Posts: 626
- Joined: Mon Feb 15, 2010 11:36 am
- Location: Milford, CT
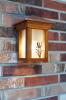
More pics


Michael Mayo
Senior IT Support Engineer
Soft Designs Inc.
albiemanmike@gmail.com
1960's SS Mark VII, 1954 Greenie, 1983 Mark V, Jointer, Bandsaw, Jigsaw, Dewalt Slider, Delta Super 10, Delta 8" Grinder, Craftsman compressor, Drill Doctor, Kreg PH Jig, Bosch Jigsaw, Craftsman Router and Table...........and adding more all the time....
Senior IT Support Engineer
Soft Designs Inc.
albiemanmike@gmail.com
1960's SS Mark VII, 1954 Greenie, 1983 Mark V, Jointer, Bandsaw, Jigsaw, Dewalt Slider, Delta Super 10, Delta 8" Grinder, Craftsman compressor, Drill Doctor, Kreg PH Jig, Bosch Jigsaw, Craftsman Router and Table...........and adding more all the time....