Today in the Shop "Building a steam box"

This is a forum for intermediate to advanced woodworkers. Show off your projects or share your ideas.

Moderators: HopefulSSer, admin

User avatar
reible
Platinum Member
Posts: 11283
Joined: Thu Jul 20, 2006 12:08 pm
Location: Aurora, IL

Today in the Shop "Building a steam box"

Post by reible »

Got a later start then I hoped for and didn't finish it today. The good news is that I almost finished. I should be able to drill the holes for the dowel and install them and then add steam to see how bad it leaks. If it too bad then I might have to tape the joints with duct tape or something.....

So I took a few pictures to share. I decided to use my tried and true setup, I have really enjoyed using my two centipede tables, this one for smaller project and the large one for full sheets of plywood projects.
IMG_4515sc.jpg
IMG_4515sc.jpg (530.29 KiB) Viewed 12143 times
I found it is much nicer to have a plywood base to work on for almost all the projects. I have this left over sheet of plywood from my last storage rack build that is a really good size for it.
IMG_4516sc.jpg
IMG_4516sc.jpg (367.37 KiB) Viewed 12143 times
When I want to cut on it I add this sheet of pink foam that is also sized to fit pretty well. I use the plywood good side down so the rubber feet hold good and then the ruff side of the plywood is up against the foam so it holds well.
IMG_4520sc.jpg
IMG_4520sc.jpg (380.52 KiB) Viewed 12143 times
I went with the cheapest pine I could find. As you can see the length of 4 feet can vary a lot. The other ends are lined up and this is what the results are:
IMG_4521sc.jpg
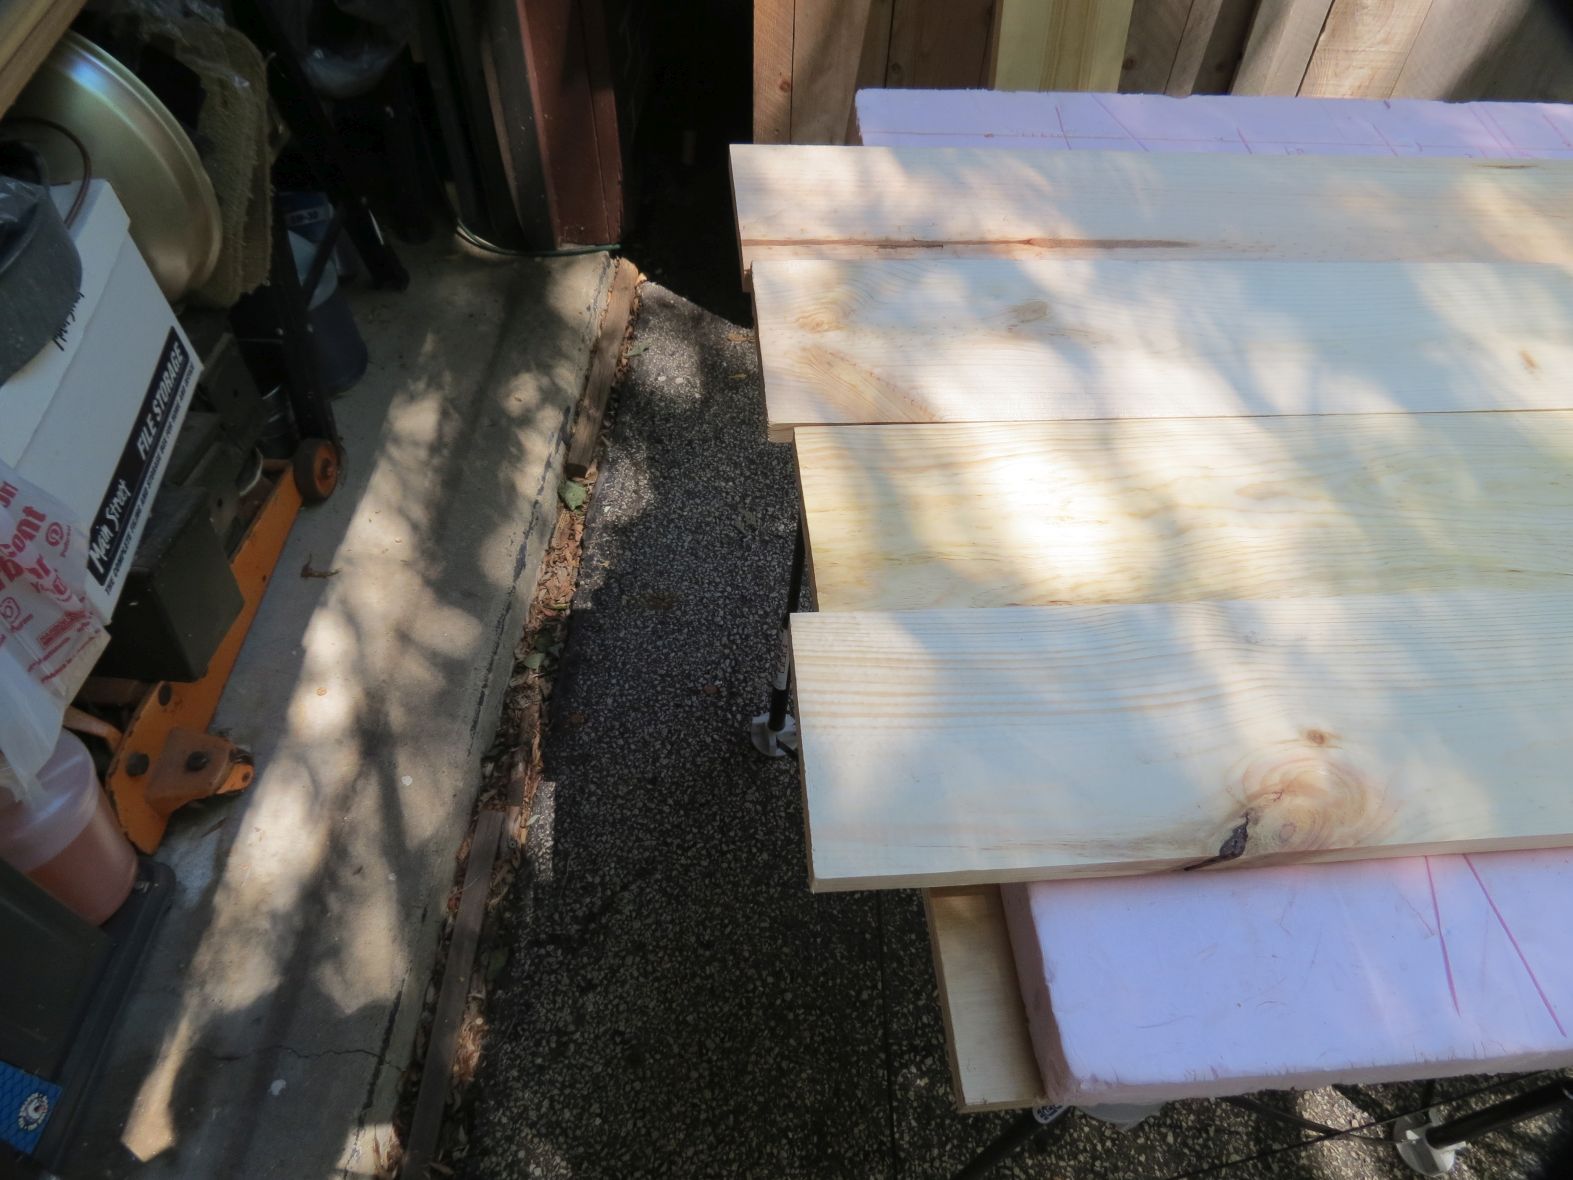
IMG_4521sc.jpg (218.28 KiB) Viewed 12143 times
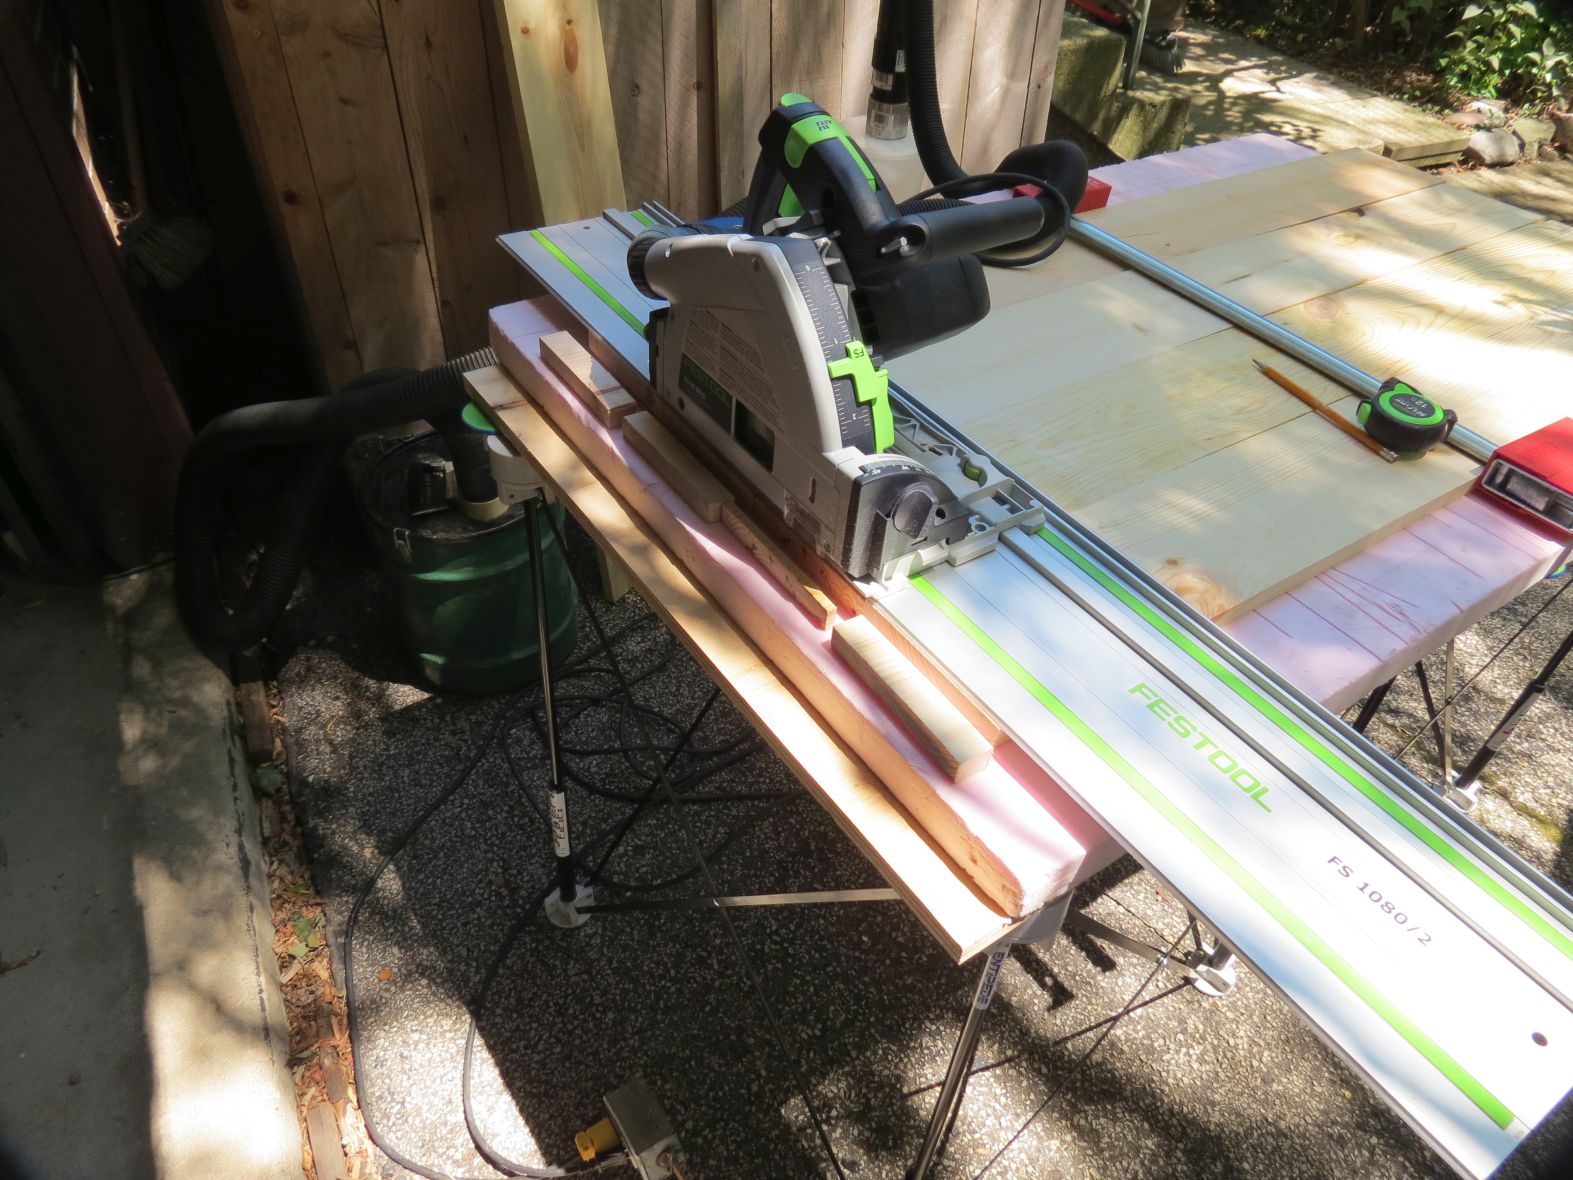
Now there are many ways to get them all the same length but since I have a festool saw and rail I love doing it that way. I start at the "even" end and cut the boards all together and get them both even and square. I took off just a little bit to preserve the most length I could.
IMG_4522sc.jpg
IMG_4522sc.jpg (218.01 KiB) Viewed 12143 times
Then I went to the other ragged end and again make a cut to even them and to get them square.
IMG_4523sc.jpg
IMG_4523sc.jpg (309.03 KiB) Viewed 12143 times
BTW in case you missed it I had clamped the boards together so they stay together like a single board. A single clamp in the middle worked for that.
IMG_4525sc.jpg
IMG_4525sc.jpg (284.4 KiB) Viewed 12143 times
Then it was time to figure out where the screws were going to go and mark the locations. Since I was on to assemble I pulled the foam off to preserve it for a bit longer. I also didn't want to drill into my plywood so I put some scraps under the work pieces.
IMG_4526sc.jpg
IMG_4526sc.jpg (347 KiB) Viewed 12143 times
After pre-drilling I started to assemble the box connecting two boards together twice. This picture shows that:
IMG_4527sc.jpg
IMG_4527sc.jpg (361.92 KiB) Viewed 12143 times
Then I took the two sub assemblies and made the box:
IMG_4528sc.jpg
IMG_4528sc.jpg (321.77 KiB) Viewed 12143 times
At this point we going to take a short intermission while a get a snack. I'll be back and we can see how it goes together.

Ed
{Knight of the Shopsmith} [Hero's don't wear capes, they wear dog tags]
User avatar
reible
Platinum Member
Posts: 11283
Joined: Thu Jul 20, 2006 12:08 pm
Location: Aurora, IL

Re: Today in the Shop "Building a steam box"

Post by reible »

With the box together it was time to add some legs. The plans call for the front or door side to be higher then the steam feed side. In my scrap bin I found a couple of pieces that seem to fit the bill. I clamped then together and then used large bit to drill a hole.
IMG_4529sc.jpg
IMG_4529sc.jpg (289.67 KiB) Viewed 12140 times
So when the clamp comes off you have two parts that look like this:
IMG_4530sc.jpg
IMG_4530sc.jpg (315.78 KiB) Viewed 12140 times
I then drilled the legs so I could use a reasonable length of screw to attach it to the box. Countersinking large enough so I could use my drill with extension to screw them on.
IMG_4531sc.jpg
IMG_4531sc.jpg (238.08 KiB) Viewed 12140 times
IMG_4532sc.jpg
IMG_4532sc.jpg (182.12 KiB) Viewed 12140 times
The longer leg was done the same way but of course the hole was deeper.

This is what it looks like with the feet on:
IMG_4533sc.jpg
IMG_4533sc.jpg (389.92 KiB) Viewed 12140 times
Now it needs the back cover, the one where the steam enters, it has a hole for the steam fitting in the middle. Now I made no attempt to get the box square and the lumber was doing its own thing. If I had to cut the end and get it to fit then using tools designed to make things square don't work so well. However the way I did it works fine, first tracing the end on a piece of wider pin first. Here is what it looked like, X marks the center for later drilling.
IMG_4534sc.jpg
IMG_4534sc.jpg (182.79 KiB) Viewed 12140 times
Again using the festool track to align to the line made quick work of the non square cuts.
IMG_4535sc.jpg
IMG_4535sc.jpg (181.06 KiB) Viewed 12140 times
IMG_4536sc.jpg
IMG_4536sc.jpg (269.9 KiB) Viewed 12140 times
I did the other end the same way and that work very well.

And that is it for this post. I'll be back shortly to continue the story.

Ed
Last edited by reible on Sun Aug 06, 2017 5:50 pm, edited 1 time in total.
{Knight of the Shopsmith} [Hero's don't wear capes, they wear dog tags]
User avatar
reible
Platinum Member
Posts: 11283
Joined: Thu Jul 20, 2006 12:08 pm
Location: Aurora, IL

Re: Today in the Shop "Building a steam box"

Post by reible »

Now we are at the stage where we open the steam bending kit box. Exciting for me be much less so you you I'm sure, well unless you go and order one for yourself and get to do your own box opening.
IMG_4537sc.jpg
IMG_4537sc.jpg (214.83 KiB) Viewed 12134 times
I then got the steam fitting out and drilled the hole for it. There is a nut on the inside and then this threaded portion for the hose. Here it is mounted:
IMG_4538sc.jpg
IMG_4538sc.jpg (172.36 KiB) Viewed 12134 times
Next it was time to mount the hinges. And here is what they look like:
IMG_4539sc.jpg
IMG_4539sc.jpg (165.59 KiB) Viewed 12134 times
Then the latch they supplied:
IMG_4540sc.jpg
IMG_4540sc.jpg (241.9 KiB) Viewed 12134 times
They don't supply a gasket for the door so you have to. What I had hoped to use I have lost somewhere in the shop......... so I went with what I could find. Time will tell if it will work. Anyway it is in place and the open door with gasket looks like this:
IMG_4541sc.jpg
IMG_4541sc.jpg (233.46 KiB) Viewed 12134 times
And that is as far as I got this afternoon.

I'll add the final details after they happen and then we can get on to a live steam test..........

Ed
{Knight of the Shopsmith} [Hero's don't wear capes, they wear dog tags]
Dansmith
Gold Member
Posts: 489
Joined: Fri Feb 03, 2017 2:02 pm
Location: Idaho

Re: Today in the Shop "Building a steam box"

Post by Dansmith »

Very nice work, Ed. What kind of projects do you have in mind for steam bending?
User avatar
algale
Platinum Member
Posts: 4796
Joined: Thu Nov 04, 2010 8:13 am

Re: Today in the Shop "Building a steam box"

Post by algale »

I like how you did the feet! Never would have thought of that myself.
Gale's Law: The bigger the woodworking project, the less the mistakes show in any photo taken far enough away to show the entire project!

masonsailor2
Platinum Member
Posts: 1564
Joined: Wed Feb 05, 2014 11:57 am
Location: Las Vegas NV

Re: Today in the Shop "Building a steam box"

Post by masonsailor2 »

I am getting excited to see the results ! I have seen them made of PVC pipe but never out of wood. Very anxious to see how the Rockler steam generator works.
Paul
User avatar
reible
Platinum Member
Posts: 11283
Joined: Thu Jul 20, 2006 12:08 pm
Location: Aurora, IL

Re: Today in the Shop "Building a steam box"

Post by reible »

As of 2:40 this afternoon steam is on!

So what has happened between times? Well that is what this post is about.

The "plans" give few details so I'm winging it mostly with hopes I'm close enough for it to work well enough.

My next task was to install dowels for the work pieces to rest on in the steam room. I had some 5/16" dowel material so I went with that. I was also very unsure as to where the dowels should go, how many of them and all the details between.

My approach was to do just 3 dowels to start with and then go from there as the need or facts come in to play. Since I want to have some flex ability early on I went with a piece of plywood and drilled three holes in it, this would serve two purposes, first it will allow me to use it as a guide for where the holes in the box would go and second I can pull them out and plug the holes if I'm wrong about placement or size.

So with the three holes it looks like this:
IMG_4542sc.jpg
IMG_4542sc.jpg (247.44 KiB) Viewed 12021 times
The holes are 5/16" and using the same brad point drill I use to drill them I can mark the hole locations on the box. Of course I had a guide line on the box to start with.
IMG_4543sc.jpg
IMG_4543sc.jpg (180.94 KiB) Viewed 12021 times
IMG_4544sc.jpg
IMG_4544sc.jpg (191.58 KiB) Viewed 12021 times
With the hole locations marked I went to a drill guide to make sure the holes were vertical. This is my standby tool for this:
IMG_4545sc.jpg
IMG_4545sc.jpg (187.04 KiB) Viewed 12021 times
With the holes drilled I then inserted the dowels until they touch the far side (hole only on one side). Using the plywood I marked the lengths.
IMG_4546sc.jpg
IMG_4546sc.jpg (240.93 KiB) Viewed 12021 times
I cut the dowels and put them into the box.
IMG_4548sc.jpg
IMG_4548sc.jpg (175.22 KiB) Viewed 12021 times
Now comes the time to see how well I did. Will the plywood fit? Of course it does.
IMG_4549sc.jpg
IMG_4549sc.jpg (182.61 KiB) Viewed 12021 times
So now let's take a look inside:
IMG_4550sc.jpg
IMG_4550sc.jpg (163.89 KiB) Viewed 12021 times
At this point I have to get back to the steam box and see how it is doing, actually I've slipped away a few time to check on it but now I have to do a few prep things for the project that is in the box.

Ed
{Knight of the Shopsmith} [Hero's don't wear capes, they wear dog tags]
User avatar
reible
Platinum Member
Posts: 11283
Joined: Thu Jul 20, 2006 12:08 pm
Location: Aurora, IL

Re: Today in the Shop "Building a steam box"

Post by reible »

Next I need to drill a "small" vent hole in the front cover.
IMG_4551sc.jpg
IMG_4551sc.jpg (255.88 KiB) Viewed 12014 times
The rear cover needs a drain hole.
IMG_4552sc.jpg
IMG_4552sc.jpg (161.33 KiB) Viewed 12014 times
At this point the box construction is finished enough for testing.

The steam generator label might be of some use to those thinking about by passing the kit for a more diy version.
IMG_4554sc.jpg
IMG_4554sc.jpg (141.29 KiB) Viewed 12014 times
Next it was time to connect the hose. They screw on both ends.
IMG_4555sc.jpg
IMG_4555sc.jpg (212.02 KiB) Viewed 12014 times
IMG_4556sc.jpg
IMG_4556sc.jpg (245.17 KiB) Viewed 12014 times
We have hard water so I got a gallon of this for the steam:
IMG_4558sc.jpg
IMG_4558sc.jpg (160.96 KiB) Viewed 12014 times
After filling the tank I plugged it in and let it start cooking.
IMG_4560sc.jpg
IMG_4560sc.jpg (241.65 KiB) Viewed 12014 times
I did not have a meat thermometer so that hole is missing as well as the function. Sometime this week I'll go shopping for one.

OK then I'll be back later with some more information and details of what happened.

Ed
{Knight of the Shopsmith} [Hero's don't wear capes, they wear dog tags]
User avatar
reible
Platinum Member
Posts: 11283
Joined: Thu Jul 20, 2006 12:08 pm
Location: Aurora, IL

Re: Today in the Shop "Building a steam box"

Post by reible »

Looks like no joy in Aurora today. Three strikes and I'm out.

In each of the cases twisting to 90 degrees was no problem. Somewhere near 180 degrees things went bad. You hear a crack and then it just splits open. Only one the three got any where near the 180, in fact it just about make it but not quite.

So this leaves me with two options. One is to scrap the whole idea of the twisted wood or to try a few new things. This was a project that I needed to get done by next weekend so I don't see that happening. Perhaps on to other things then get back to this later in the fall.

Thinner wood, different type of wood and seeing if I can live with just a 90 degree twist.... Well perhaps I'll just have better luck next time.

I read 136 degrees on the outside top of the box. Wish I had taken a reading inside the box when I opened it but I wanted to get a work piece and get it closed back up so things didn't cool down too much. Next time perhaps.

The aftermath:
IMG_4564sc.jpg
IMG_4564sc.jpg (364.97 KiB) Viewed 12003 times
And the worst case:
IMG_4565sc.jpg
IMG_4565sc.jpg (279.95 KiB) Viewed 12003 times
Ed
{Knight of the Shopsmith} [Hero's don't wear capes, they wear dog tags]
Hobbyman2
Platinum Member
Posts: 2660
Joined: Wed Feb 01, 2017 12:52 am
Location: Ohio

Re: Today in the Shop "Building a steam box"

Post by Hobbyman2 »

Try steaming it longer ?
Hobbyman2 Favorite Quote: "If a man does his best, what else is there?"
- General George S. Patton (1885-1945)
Post Reply