Page 2 of 7
Re: My Next Project
Posted: Thu Dec 18, 2014 5:44 pm
by charlese
Here's what I'm going with - -
http://www.americanfurnituredsgn.com/ Look for Nancy's Rocker
Re: My Next Project
Posted: Thu Dec 18, 2014 11:11 pm
by rjent
First charlese, you will do this in spades! I look forward to seeing how it turns out.
Second, that video is amazing. Simple jig, but what an amazing result ...
Dick
Re: My Next Project
Posted: Thu Dec 18, 2014 11:29 pm
by charlese
masonsailor2 wrote:Are you planning to steam bend the slats ?
Paul
--------------------------------------------------------------------------------------------------------------
No! Thank goodness! The slats will be sawn on the bandsaw.
Re: My Next Project
Posted: Fri Dec 19, 2014 5:57 pm
by edflorence
Wow, looks ambitious! Should be a fun project though...have you thought about using traditional hand tools for the final shaping of the seat? Scorp and Inshave? What wood are you going to use?
Re: My Next Project
Posted: Fri Dec 19, 2014 7:30 pm
by john_001
Very nice! Did you check out the Dec. 2014 FWW? It has an article about making Windsor chairs almost entirely by hand - and specifically about using scorps and using split wood for spindles - that may be interesting.
Re: My Next Project
Posted: Sat Dec 20, 2014 12:26 am
by charlese
Thanks for the reminder, John001! I vaguely remember that article. It was before we (wife and I) found out grand daughter in law was expecting. When finding out the news, I asked what I could build for the baby. She said, without hesitating, "a tall rocking chair". I knew right away there was a challenge ahead.
One of those rockers had kinda been on my "Bucket list" but never had the necessary impetus! Now all of a sudden there was - in spades!
I will be sure to read that article carefully! The Windsor is quite different than a high rocker, but I'm sure there is info. that will be useful.
----------------------------------------------------------------------------------
Re: My Next Project
Posted: Mon Mar 09, 2015 1:00 pm
by charlese
After making some progress on the rocker, it's now time to post some photos of the progress. Oh Yeah! Still a couple of months to go and lots of rasping, riffling and sanding to do. Wish I could say it is nearing the end, but there's much to do.
Like the instruction book said - The plans show full scale parts, but adjustments will be necessary.
Here's some pics:
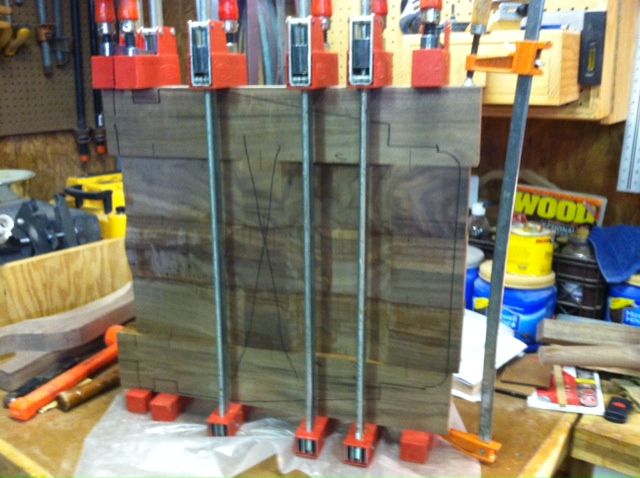
- gluing seat.JPG (137.14 KiB) Viewed 2699 times
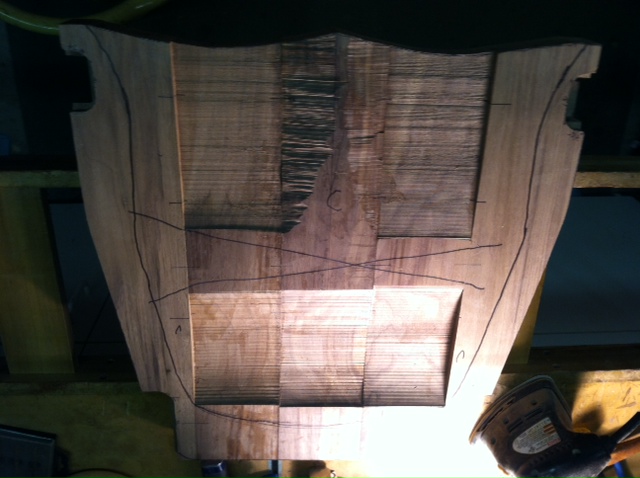
- seat bandsawn.JPG (100.4 KiB) Viewed 2699 times
biscuit joiner.JPG[/attach]
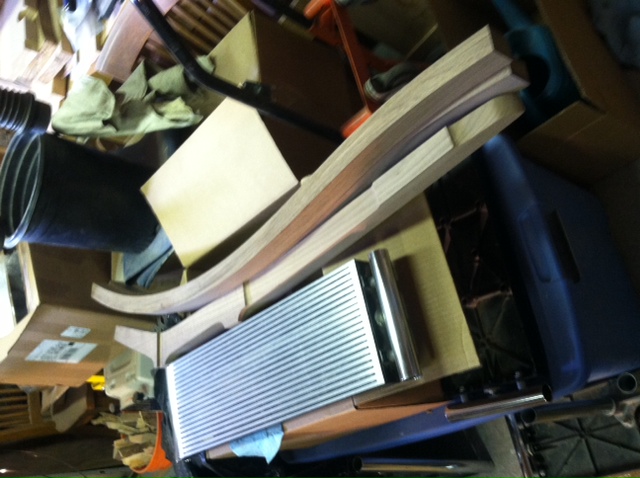
[attachment=4]laminating rocker.JPG
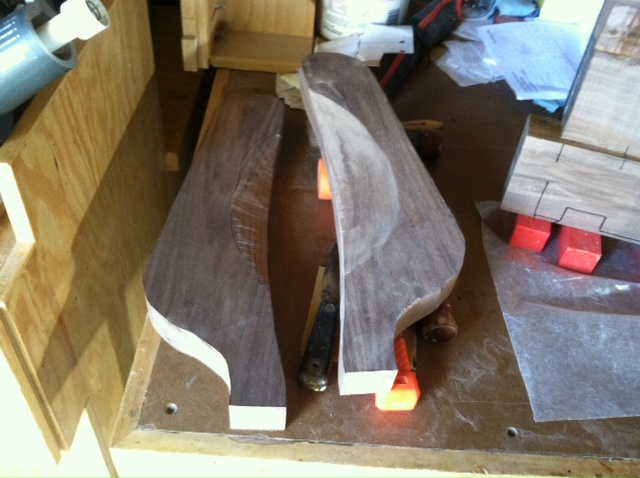
- back leg and rocker.JPG (120.58 KiB) Viewed 2699 times
- arms with bandsawn shape.JPG (118.32 KiB) Viewed 2699 times
Re: My Next Project
Posted: Mon Mar 09, 2015 1:11 pm
by charlese
Re: My Next Project
Posted: Mon Mar 09, 2015 4:07 pm
by rjent
That is going to be fabulous! Nice taper turnings ....

(I assume that is how you did it LOL)
Re: My Next Project
Posted: Mon Mar 09, 2015 8:47 pm
by charlese
rjent wrote:That is going to be fabulous! Nice taper turnings ....
(I assume that is how you did it LOL)
Hope it's going to look good! Yes, after making the joints in the front legs, had to turn the top and bottom.
This leg has the most difficult joint I've ever made - a center flat to mate with the cut out in the chair, plus a rounded
raised rabbet to meet with the rabbet in the chair and also cut to fit the top and bottom of the seat with no gap. - - All to be at a depth that will allow some rounding of the outside of the joint and shallow enough to allow inserting two screws through the joint. This took me two days per leg.
Side Note: And of all things, had to throw away one leg after hitting an embedded nail. It was bent and evidently burned. This caused to wood above and below the nail to be charred. looked just like the next morning of a yule log fire, all grown over by the tree. Completely hidden!

The back legs cutout in the seat are tapered at 5 degrees. Also the rabbets are tapered to 5 Deg. The plans called for buying a special set of router bits tapered at 95 and 85 degrees. Instead I used the Shopsmith tilting table and chisel work to shape (slope) the rabbets.